
 Latest images
GC Patch Batch
Page 1 of 2 • 1, 2 ![]()
![]()
 GC Patch Batch
![]() Aleron Ives Mon Nov 28, 2016 3:49 pm
Aleron Ives Mon Nov 28, 2016 3:49 pm
Be aware that these are client-side patches, meaning they require you to patch your ISO of the game. As such, they are only compatible with Wii and Dolphin. Once BlueCrab implements server-side patching, you can use all of these patches on original GC hardware, too. For the moment you would have to have a modchip or homebrew to run a patched version of PSO on a real GC.
Full Word Select Patch
- Code:
Phantasy Star Online GC
Full Word Select Patch
Patcher by: Aleron Ives
Patch by: Ralf
http://psopalace.funurl.com

----------------
Introduction:
----------------

Welcome to the Full Word Select Patch for PSO GC. The purpose of this patch is to fix some of the problems with the game's Word Select menu, namely that a) you can only access the Reply/Confirmation menu when you're in the lobby or on Pioneer 2, so you can't access simple answers like "Yes." and "No." when you're on Ragol, and b) you can only access the Word Select categories for your current location, so you can't access Pioneer 2 Word Selects on Ragol, lobby Word Selects on Pioneer 2, and so forth.

The patch addresses these problems by unlocking a previously unused copy of the Word Select menu used in PSO Ver.2. The V2 Word Select menu allows you to access all Word Select categories at all times, which fixes both of the above problems. If you're unfamiliar with the V2 Word Select menu, there are three things you should know about it:

1) There is no "Recommended answer" category that appears when somebody else asks you a question with Word Select. Instead, relevant replies appear at the top of the "FIXED:ANSWERS" menu, above the "Yes." and "No." options. Once you pick any reply from the answers menu, the relevant replies will disappear, and "Yes." and "No." will be at the top again.

2) The "FIXED:RECOMMEND" category at the top of the menu is a shortcut to the most relevant Word Select category for your current area. This category automatically contains the same strings as the IN THE LOBBY/CITY/AREA/BATTLE categories, depending upon whether you're in the lobby, on Pioneer 2, on Ragol, or in a room with monsters. As such, you can access the most relevant Word Select options for your current situation without having to scroll down to where that category appears in the main Word Select menu.

3) There is no "Other" category. You can find the strings from the "Other" category at the bottom of the "FIXED:GREETINGS" category.

In short, the benefit of the GC Word Select system is that it makes it easier to find specific Word Selects by breaking up the menu into several categories based on where you are, but this also means you may not be able to find the Word Select you want to use if you're in an area where that Word Select doesn't appear in the menu.

The benefit of the V2 Word Select system is that you can use any Word Select at any time, so you always have access to anything you might want to say, but this also means that you have to do a lot of scrolling through massive lists in order to find the Word Select you want to use.

--------------
Installation:
--------------

After downloading and unzipping the PSO_GC_Full_Word_Select_Patch.zip archive, you should have this README.txt file, as well as six different patching programs. Each patching program is meant for one of the six possible PSO GC releases that you might have:

NTSC-J 1.02 (JP regular disc)
NTSC-J 1.05 (JP Plus disc)
NTSC-U 1.00 (US regular disc)
NTSC-U 1.01 (US regular disc)
NTSC-U 1.02 (US Plus disc)
PAL 1.00 (EU regular disc)

If you're not sure which version of the game you have, look at the inner ring on the bottom of your disc, and you should see one of these product numbers:

DOL-GPOJ-0-02 (JP 1.02)
DOL-GPOJ-0-05 (JP 1.05 Plus)
DOL-GPOE-0-00 (US 1.00)
DOL-GPOE-0-01 (US 1.01)
DOL-GPOE-0-02 (US 1.02 Plus)
DOL-GPOP-0-00 (EU 1.00)

You only need to use the patching program that matches the ISO dump of the disc you have.

Always be sure to keep a clean backup copy of your ISO, so that you don't have to dump your game again if you make a mistake!

In order to patch your ISO, you will need to use GCRebuilder to extract the game's main exectuable file, "PsoV3.dol". If you don't have GCRebuilder, you can find it in the GC downloads section of the main site. If you want a tutorial with pictures, you can find one in the GC guides section of the main site; otherwise, follow these steps:

1) Open GCRebuilder, select the "Image" option at the top, then select "Open". GCRebuilder will ask you to select an image to open. Navigate to the location of your PSO ISO file, select it, then click the "Open" button.

2) You will now see information about your PSO disc on the left side of the main GCRebuilder window, as well as a list of all the files on the disc on the right side of the main GCRebuilder window. The files are shown in alphabetical order by default, so use the scrollbar to scroll down until you find the file "PsoV3.dol".

Right click on the filename, and you'll get a small popup with the options "Import..." and "Export...". Click the "Export..." option, and then GCRebuilder will ask where you want to export this file. For simplicity, I suggest exporting it to C:\. Click the "Save" button to export PsoV3.dol to the folder you selected. We're done with GCRebuilder for the moment, but don't close it yet.

3) Now that we have extracted PsoV3.dol from the ISO, it's time to patch it. Run the patching program that matches the PSO disc you have, and then click the "..." button. A window will open asking you to select the "PsoV3.dol" file you want to patch. Navigate to C:\, and you should see the "PsoV3.dol" file you just extracted from your ISO. Select it, then click the "Open" button. I recommend unchecking the "Make a backup when possible" option, as you don't need a backup copy of "PsoV3.dol". Now press the "Start" button, and you should get confirmation that the file was successfully patched. When you close this message, the patching program will automatically close, too. You have now applied the patch, so it's time for the final step.

Before you begin the final step, you may want to apply other patches to your "PsoV3.dol" file. Once you've applied all of the patches you want to use, it's time to put the modified "PsoV3.dol" back into your ISO.

4) You should still have GCRebuilder open at this point, so this step is easy. Right click on "PsoV3.dol" in the GCRebuilder file list again, but this time, select the "Import..." option. A window will open asking you to select the file you want to import. Navigate to C:\ and select the "PsoV3.dol" file you patched in step 3. Click the "Open" button, and then you should get a confirmation window to indicate that the file import was successful.

That's it! You can now close GCRebuilder and use your patched PSO ISO file to play with Wii or Dolphin (or GC, if you have the necessary homebrew).

--------------------
Troubleshooting:
--------------------

If the patching program gives an error that says:

"PsoV3.dol - File size/version missmatch!"

then that means you tried to use a patching program that doesn't match your PSO disc. Double check which version of PSO GC you have and then select the patching program that matches your disc.

---------
Credits:
---------

Huge thanks go out to Ralf for making this patch, as nobody even knew that PSO GC had a fully functional copy of the original Word Select system until he found it, and there are very few people who have the experience needed to find things like this in GC games.

That's the end of this README; I hope everyone enjoys being able to finally use whatever Word Select they want, whenever they want. Don't forget to visit PSO Palace, the home of this patch.

http://psopalace.funurl.com
Quest Music Patch
- Code:
Phantasy Star Online GC
Quest Music Patch
Patcher by: Aleron Ives
Patch by: Aleron Ives
http://psopalace.funurl.com

----------------
Introduction:
----------------

Welcome to the Quest Music Patch for PSO GC. The purpose of this patch is to let you hear the correct music when you play Episode I Spaceship and Palace quests, such as Prospective Horizons. With this patch, you will be able to hear "Versus 1: Tricktrack" in Spaceship and "Versus 2: A Longing To Ancient Times" in Palace.

--------------
Installation:
--------------

After downloading and unzipping the PSO_GC_Quest_Music_Patch.zip archive, you should have this README.txt file, as well as six different patching programs. Each patching program is meant for one of the six possible PSO GC releases that you might have:

NTSC-J 1.02 (JP regular disc)
NTSC-J 1.05 (JP Plus disc)
NTSC-U 1.00 (US regular disc)
NTSC-U 1.01 (US regular disc)
NTSC-U 1.02 (US Plus disc)
PAL 1.00 (EU regular disc)

If you're not sure which version of the game you have, look at the inner ring on the bottom of your disc, and you should see one of these product numbers:

DOL-GPOJ-0-02 (JP 1.02)
DOL-GPOJ-0-05 (JP 1.05 Plus)
DOL-GPOE-0-00 (US 1.00)
DOL-GPOE-0-01 (US 1.01)
DOL-GPOE-0-02 (US 1.02 Plus)
DOL-GPOP-0-00 (EU 1.00)

You only need to use the patching program that matches the ISO dump of the disc you have.

Always be sure to keep a clean backup copy of your ISO, so that you don't have to dump your game again if you make a mistake!

In order to patch your ISO, you will need to use GCRebuilder to extract the game's main exectuable file, "PsoV3.dol". If you don't have GCRebuilder, you can find it in the GC downloads section of the main site. If you want a tutorial with pictures, you can find one in the GC guides section of the main site; otherwise, follow these steps:

1) Open GCRebuilder, select the "Image" option at the top, then select "Open". GCRebuilder will ask you to select an image to open. Navigate to the location of your PSO ISO file, select it, then click the "Open" button.

2) You will now see information about your PSO disc on the left side of the main GCRebuilder window, as well as a list of all the files on the disc on the right side of the main GCRebuilder window. The files are shown in alphabetical order by default, so use the scrollbar to scroll down until you find the file "PsoV3.dol".

Right click on the filename, and you'll get a small popup with the options "Import..." and "Export...". Click the "Export..." option, and then GCRebuilder will ask where you want to export this file. For simplicity, I suggest exporting it to C:\. Click the "Save" button to export PsoV3.dol to the folder you selected. We're done with GCRebuilder for the moment, but don't close it yet.

3) Now that we have extracted PsoV3.dol from the ISO, it's time to patch it. Run the patching program that matches the PSO disc you have, and then click the "..." button. A window will open asking you to select the "PsoV3.dol" file you want to patch. Navigate to C:\, and you should see the "PsoV3.dol" file you just extracted from your ISO. Select it, then click the "Open" button. I recommend unchecking the "Make a backup when possible" option, as you don't need a backup copy of "PsoV3.dol". Now press the "Start" button, and you should get confirmation that the file was successfully patched. When you close this message, the patching program will automatically close, too. You have now applied the patch, so it's time for the final step.

Before you begin the final step, you may want to apply other patches to your "PsoV3.dol" file. Once you've applied all of the patches you want to use, it's time to put the modified "PsoV3.dol" back into your ISO.

4) You should still have GCRebuilder open at this point, so this step is easy. Right click on "PsoV3.dol" in the GCRebuilder file list again, but this time, select the "Import..." option. A window will open asking you to select the file you want to import. Navigate to C:\ and select the "PsoV3.dol" file you patched in step 3. Click the "Open" button, and then you should get a confirmation window to indicate that the file import was successful.

That's it! You can now close GCRebuilder and use your patched PSO ISO file to play with Wii or Dolphin (or GC, if you have the necessary homebrew).

--------------------
Troubleshooting:
--------------------

If the patching program gives an error that says:

"PsoV3.dol - File size/version missmatch!"

then that means you tried to use a patching program that doesn't match your PSO disc. Double check which version of PSO GC you have and then select the patching program that matches your disc.

---------
Credits:
---------

Thanks go out Ivy/Kuromori Yu for teaching me how to make memory dumps with Dolphin's debugger, as this patch wouldn't have been possible otherwise.

That's the end of this README; I hope everyone enjoys having the correct music in Spaceship and Palace. Don't forget to visit PSO Palace, the home of this patch.

http://psopalace.funurl.com
Disc Music Patch
- Code:
Phantasy Star Online GC
Disc Music Patch
Patcher by: Aleron Ives
Patch by: Aleron Ives
http://psopalace.funurl.com

----------------
Introduction:
----------------

Welcome to the Disc Music Patch for PSO GC. The purpose of this patch is to change the obnoxious music that most of the music discs play into something people might actually want to listen to. Hopefully you approve of my music selections. =P

The patch makes the following music changes:

Disc Vol.1: Wedding -> Rose Confession
Disc Vol.4: Open Your Heart -> Versus 1: Tricktrack
Disc Vol.5: Live & Learn -> Versus 2: A Longing To Ancient Times
Disc Vol.6: Dreams (Kids) -> Leavin' Flow

Remember that this patch only affects what you hear when each disc is playing; it doesn't affect what anybody else hears, so you should still be courteous and ask your teammates' permission before you force them to listen to songs they might not enjoy. ;)

--------------
Installation:
--------------

After downloading and unzipping the PSO_GC_Disc_Music_Patch.zip archive, you should have this README.txt file, as well as six different patching programs. Each patching program is meant for one of the six possible PSO GC releases that you might have:

NTSC-J 1.02 (JP regular disc)
NTSC-J 1.05 (JP Plus disc)
NTSC-U 1.00 (US regular disc)
NTSC-U 1.01 (US regular disc)
NTSC-U 1.02 (US Plus disc)
PAL 1.00 (EU regular disc)

If you're not sure which version of the game you have, look at the inner ring on the bottom of your disc, and you should see one of these product numbers:

DOL-GPOJ-0-02 (JP 1.02)
DOL-GPOJ-0-05 (JP 1.05 Plus)
DOL-GPOE-0-00 (US 1.00)
DOL-GPOE-0-01 (US 1.01)
DOL-GPOE-0-02 (US 1.02 Plus)
DOL-GPOP-0-00 (EU 1.00)

You only need to use the patching program that matches the ISO dump of the disc you have.

Always be sure to keep a clean backup copy of your ISO, so that you don't have to dump your game again if you make a mistake!

In order to patch your ISO, you will need to use GCRebuilder to extract the game's main exectuable file, "PsoV3.dol". If you don't have GCRebuilder, you can find it in the GC downloads section of the main site. If you want a tutorial with pictures, you can find one in the GC guides section of the main site; otherwise, follow these steps:

1) Open GCRebuilder, select the "Image" option at the top, then select "Open". GCRebuilder will ask you to select an image to open. Navigate to the location of your PSO ISO file, select it, then click the "Open" button.

2) You will now see information about your PSO disc on the left side of the main GCRebuilder window, as well as a list of all the files on the disc on the right side of the main GCRebuilder window. The files are shown in alphabetical order by default, so use the scrollbar to scroll down until you find the file "PsoV3.dol".

Right click on the filename, and you'll get a small popup with the options "Import..." and "Export...". Click the "Export..." option, and then GCRebuilder will ask where you want to export this file. For simplicity, I suggest exporting it to C:\. Click the "Save" button to export PsoV3.dol to the folder you selected. We're done with GCRebuilder for the moment, but don't close it yet.

3) Now that we have extracted PsoV3.dol from the ISO, it's time to patch it. Run the patching program that matches the PSO disc you have, and then click the "..." button. A window will open asking you to select the "PsoV3.dol" file you want to patch. Navigate to C:\, and you should see the "PsoV3.dol" file you just extracted from your ISO. Select it, then click the "Open" button. I recommend unchecking the "Make a backup when possible" option, as you don't need a backup copy of "PsoV3.dol". Now press the "Start" button, and you should get confirmation that the file was successfully patched. When you close this message, the patching program will automatically close, too. You have now applied the patch, so it's time for the final step.

Before you begin the final step, you may want to apply other patches to your "PsoV3.dol" file. Once you've applied all of the patches you want to use, it's time to put the modified "PsoV3.dol" back into your ISO.

4) You should still have GCRebuilder open at this point, so this step is easy. Right click on "PsoV3.dol" in the GCRebuilder file list again, but this time, select the "Import..." option. A window will open asking you to select the file you want to import. Navigate to C:\ and select the "PsoV3.dol" file you patched in step 3. Click the "Open" button, and then you should get a confirmation window to indicate that the file import was successful.

That's it! You can now close GCRebuilder and use your patched PSO ISO file to play with Wii or Dolphin (or GC, if you have the necessary homebrew).

--------------------
Troubleshooting:
--------------------

If the patching program gives an error that says:

"PsoV3.dol - File size/version missmatch!"

then that means you tried to use a patching program that doesn't match your PSO disc. Double check which version of PSO GC you have and then select the patching program that matches your disc.

---------
Credits:
---------

Thanks go out Ivy/Kuromori Yu for teaching me how to make memory dumps with Dolphin's debugger, as this patch wouldn't have been possible otherwise.

That's the end of this README; I hope everyone enjoys the new music options. Don't forget to visit PSO Palace, the home of this patch.

http://psopalace.funurl.com
Ending Music Patch
- Code:
Phantasy Star Online GC
Ending Music Patch
Patcher by: Aleron Ives
Patch by: Aleron Ives
http://psopalace.funurl.com

----------------
Introduction:
----------------

Welcome to the Ending Music Patch for PSO GC. The purpose of this patch is to replace the short, looping ending music that normally plays when you beat Dark Falz and Olga Flow online with the full songs that play during the credits in offline mode. In the case of Dark Falz, this also allows you to hear the lyrics to "Can Still See The Light", as the looping version of the song omits the lyrics entirely.

--------------
Installation:
--------------

After downloading and unzipping the PSO_GC_Ending_Music_Patch.zip archive, you should have this README.txt file, as well as six different patching programs. Each patching program is meant for one of the six possible PSO GC releases that you might have:

NTSC-J 1.02 (JP regular disc)
NTSC-J 1.05 (JP Plus disc)
NTSC-U 1.00 (US regular disc)
NTSC-U 1.01 (US regular disc)
NTSC-U 1.02 (US Plus disc)
PAL 1.00 (EU regular disc)

If you're not sure which version of the game you have, look at the inner ring on the bottom of your disc, and you should see one of these product numbers:

DOL-GPOJ-0-02 (JP 1.02)
DOL-GPOJ-0-05 (JP 1.05 Plus)
DOL-GPOE-0-00 (US 1.00)
DOL-GPOE-0-01 (US 1.01)
DOL-GPOE-0-02 (US 1.02 Plus)
DOL-GPOP-0-00 (EU 1.00)

You only need to use the patching program that matches the ISO dump of the disc you have.

Always be sure to keep a clean backup copy of your ISO, so that you don't have to dump your game again if you make a mistake!

In order to patch your ISO, you will need to use GCRebuilder to extract the game's main exectuable file, "PsoV3.dol". If you don't have GCRebuilder, you can find it in the GC downloads section of the main site. If you want a tutorial with pictures, you can find one in the GC guides section of the main site; otherwise, follow these steps:

1) Open GCRebuilder, select the "Image" option at the top, then select "Open". GCRebuilder will ask you to select an image to open. Navigate to the location of your PSO ISO file, select it, then click the "Open" button.

2) You will now see information about your PSO disc on the left side of the main GCRebuilder window, as well as a list of all the files on the disc on the right side of the main GCRebuilder window. The files are shown in alphabetical order by default, so use the scrollbar to scroll down until you find the file "PsoV3.dol".

Right click on the filename, and you'll get a small popup with the options "Import..." and "Export...". Click the "Export..." option, and then GCRebuilder will ask where you want to export this file. For simplicity, I suggest exporting it to C:\. Click the "Save" button to export PsoV3.dol to the folder you selected. We're done with GCRebuilder for the moment, but don't close it yet.

3) Now that we have extracted PsoV3.dol from the ISO, it's time to patch it. Run the patching program that matches the PSO disc you have, and then click the "..." button. A window will open asking you to select the "PsoV3.dol" file you want to patch. Navigate to C:\, and you should see the "PsoV3.dol" file you just extracted from your ISO. Select it, then click the "Open" button. I recommend unchecking the "Make a backup when possible" option, as you don't need a backup copy of "PsoV3.dol". Now press the "Start" button, and you should get confirmation that the file was successfully patched. When you close this message, the patching program will automatically close, too. You have now applied the patch, so it's time for the final step.

Before you begin the final step, you may want to apply other patches to your "PsoV3.dol" file. Once you've applied all of the patches you want to use, it's time to put the modified "PsoV3.dol" back into your ISO.

4) You should still have GCRebuilder open at this point, so this step is easy. Right click on "PsoV3.dol" in the GCRebuilder file list again, but this time, select the "Import..." option. A window will open asking you to select the file you want to import. Navigate to C:\ and select the "PsoV3.dol" file you patched in step 3. Click the "Open" button, and then you should get a confirmation window to indicate that the file import was successful.

That's it! You can now close GCRebuilder and use your patched PSO ISO file to play with Wii or Dolphin (or GC, if you have the necessary homebrew).

--------------------
Troubleshooting:
--------------------

If the patching program gives an error that says:

"PsoV3.dol - File size/version missmatch!"

then that means you tried to use a patching program that doesn't match your PSO disc. Double check which version of PSO GC you have and then select the patching program that matches your disc.

---------
Credits:
---------

Thanks go out Ivy/Kuromori Yu for teaching me how to make memory dumps with Dolphin's debugger, as this patch wouldn't have been possible otherwise.

That's the end of this README; I hope everyone enjoys having the full ending music in online mode. Don't forget to visit PSO Palace, the home of this patch.

http://psopalace.funurl.com
Last edited by Aleron Ives on Mon Apr 24, 2017 2:45 pm; edited 1 time in total
_________________
"Fear the HUnewearl."


Aleron Ives- Socially-Devoid Member

- Number of posts : 2204
Age : 36
Registration date : 2008-03-24 -

![]()
![]()
Re: GC Patch Batch
![]() Aleron Ives Sun Jan 08, 2017 3:47 pm
Aleron Ives Sun Jan 08, 2017 3:47 pm
Item Loss Prevention Patch
- Code:
Phantasy Star Online GC
Item Loss Prevention Patch
Patcher by: Aleron Ives
Patch by: Ralf & Aleron Ives
http://psopalace.funurl.com

----------------
Introduction:
----------------

Welcome to the Item Loss Prevention Patch for PSO GC. The purpose of this patch is to address a longstanding problem with PSO GC: if you fail to quit and save normally for any reason in online mode, the game deletes your unequipped items and Meseta. This is completely unfair, as the main reason for being unable to quit and save is that the game crashed, so you get punished for something that was out of your control. This patch fixes the problem by preventing the game from deleting your unequipped items and Meseta when you don't quit and save normally in online mode. The summary of how the patch works is this:

If you crash, your save file will revert to the state it was in the last time you talked to the bank, talk to the shop, or teleported to a different area.

As such, any items you had in your pack the last time the game saved will be preserved, instead of being deleted. If you find a new item while playing, you can save it in your item pack by teleporting to the next area or by using a Telepipe to return to Pioneer 2. Once the game saves with the item in your pack, you won't lose it if your game crashes. You can also still put items into the Check Room to save them, of course, although it's no longer necessary to do that with this patch.

--------------
Installation:
--------------

After downloading and unzipping the PSO_GC_Item_Loss_Prevention_Patch.zip archive, you should have this README.txt file, as well as six different patching programs. Each patching program is meant for one of the six possible PSO GC releases that you might have:

NTSC-J 1.02 (JP regular disc)
NTSC-J 1.05 (JP Plus disc)
NTSC-U 1.00 (US regular disc)
NTSC-U 1.01 (US regular disc)
NTSC-U 1.02 (US Plus disc)
PAL 1.00 (EU regular disc)

If you're not sure which version of the game you have, look at the inner ring on the bottom of your disc, and you should see one of these product numbers:

DOL-GPOJ-0-02 (JP 1.02)
DOL-GPOJ-0-05 (JP 1.05 Plus)
DOL-GPOE-0-00 (US 1.00)
DOL-GPOE-0-01 (US 1.01)
DOL-GPOE-0-02 (US 1.02 Plus)
DOL-GPOP-0-00 (EU 1.00)

You only need to use the patching program that matches the ISO dump of the disc you have.

Always be sure to keep a clean backup copy of your ISO, so that you don't have to dump your game again if you make a mistake!

In order to patch your ISO, you will need to use GCRebuilder to extract the game's main exectuable file, "PsoV3.dol". If you don't have GCRebuilder, you can find it in the GC downloads section of the main site. If you want a tutorial with pictures, you can find one in the GC guides section of the main site; otherwise, follow these steps:

1) Open GCRebuilder, select the "Image" option at the top, then select "Open". GCRebuilder will ask you to select an image to open. Navigate to the location of your PSO ISO file, select it, then click the "Open" button.

2) You will now see information about your PSO disc on the left side of the main GCRebuilder window, as well as a list of all the files on the disc on the right side of the main GCRebuilder window. The files are shown in alphabetical order by default, so use the scrollbar to scroll down until you find the file "PsoV3.dol".

Right click on the filename, and you'll get a small popup with the options "Import..." and "Export...". Click the "Export..." option, and then GCRebuilder will ask where you want to export this file. For simplicity, I suggest exporting it to C:\. Click the "Save" button to export PsoV3.dol to the folder you selected. We're done with GCRebuilder for the moment, but don't close it yet.

3) Now that we have extracted PsoV3.dol from the ISO, it's time to patch it. Run the patching program that matches the PSO disc you have, and then click the "..." button. A window will open asking you to select the "PsoV3.dol" file you want to patch. Navigate to C:\, and you should see the "PsoV3.dol" file you just extracted from your ISO. Select it, then click the "Open" button. I recommend unchecking the "Make a backup when possible" option, as you don't need a backup copy of "PsoV3.dol". Now press the "Start" button, and you should get confirmation that the file was successfully patched. When you close this message, the patching program will automatically close, too. You have now applied the patch, so it's time for the final step.

Before you begin the final step, you may want to apply other patches to your "PsoV3.dol" file. Once you've applied all of the patches you want to use, it's time to put the modified "PsoV3.dol" back into your ISO.

4) You should still have GCRebuilder open at this point, so this step is easy. Right click on "PsoV3.dol" in the GCRebuilder file list again, but this time, select the "Import..." option. A window will open asking you to select the file you want to import. Navigate to C:\ and select the "PsoV3.dol" file you patched in step 3. Click the "Open" button, and then you should get a confirmation window to indicate that the file import was successful.

That's it! You can now close GCRebuilder and use your patched PSO ISO file to play with Wii or Dolphin (or GC, if you have the necessary homebrew).

--------------------
Troubleshooting:
--------------------

If the patching program gives an error that says:

"PsoV3.dol - File size/version missmatch!"

then that means you tried to use a patching program that doesn't match your PSO disc. Double check which version of PSO GC you have and then select the patching program that matches your disc.

---------
Credits:
---------

Huge thanks go out to Ralf for making this patch, as there are very few people who have the experience needed to do things like this for GC games. This patch required quite a bit of testing and adjusting, so it is surely the biggest PSO GC patching achievement yet.

That's the end of this README; I hope everyone enjoys being able to finally play the game without having to worry about keeping backups of their important items to prevent the game from deleting them. Don't forget to visit PSO Palace, the home of this patch.

http://psopalace.funurl.com
_________________
"Fear the HUnewearl."
Aleron Ives- Socially-Devoid Member
- Number of posts : 2204
Age : 36
Registration date : 2008-03-24 -
![]()
![]()
Re: GC Patch Batch
![]() Aleron Ives Tue Feb 28, 2017 5:06 pm
Aleron Ives Tue Feb 28, 2017 5:06 pm
- Code:
Phantasy Star Online GC
Draw Distance Patch
Patcher by: Aleron Ives
Patch by: Ralf & Aleron Ives
http://psopalace.funurl.com

----------------
Introduction:
----------------

Welcome to the Draw Distance Patch for PSO GC. The purpose of this patch is to increase your ability to see your surroundings by increasing the draw distance for many of the game's objects. Each object has its own clipping threshold defined by the game, and raising this threshold allows you to see that object from farther away. This patch began as an effort to make it easier to see dropped item boxes on the ground, but it has since expanded to include over 40 other objects. PSO GC uses many of the same low clipping thresholds that PSO DC does, and since the GC hardware is more powerful than the DC hardware, it makes sense to use that extra power to give you a better view of your surroundings. As an added bonus, the patch also increases the range at which Trap Vision can reveal traps, and it allows you to view monster dots and door markers on the Area Map from a greater distance, too.

Be warned, however, that one likely reason to explain why PSO GC uses the same low clipping thresholds as PSO DC is that the clipping thresholds for most objects are the same in online mode, offline mode, and splitscreen mode. As a result, using this patch will almost surely reduce performance when you play splitscreen mode, particularly with 3 or 4 players. The patch is tuned and tested to not cause slowdown in most online and offline situations on real GC hardware, but you should probably not use this patch if you intend to play splitscreen mode, unless you're using Wii or Dolphin. Using splitscreen mode for item transfers between characters will still work fine on real GC hardware, of course, as Pioneer 2 is not very demanding.

--------------
Installation:
--------------

After downloading and unzipping the PSO_GC_Draw_Distance_Patch.zip archive, you should have this README.txt file, as well as six different patching programs. Each patching program is meant for one of the six possible PSO GC releases that you might have:

NTSC-J 1.02 (JP regular disc)
NTSC-J 1.05 (JP Plus disc)
NTSC-U 1.00 (US regular disc)
NTSC-U 1.01 (US regular disc)
NTSC-U 1.02 (US Plus disc)
PAL 1.00 (EU regular disc)

If you're not sure which version of the game you have, look at the inner ring on the bottom of your disc, and you should see one of these product numbers:

DOL-GPOJ-0-02 (JP 1.02)
DOL-GPOJ-0-05 (JP 1.05 Plus)
DOL-GPOE-0-00 (US 1.00)
DOL-GPOE-0-01 (US 1.01)
DOL-GPOE-0-02 (US 1.02 Plus)
DOL-GPOP-0-00 (EU 1.00)

You only need to use the patching program that matches the ISO dump of the disc you have.

Always be sure to keep a clean backup copy of your ISO, so that you don't have to dump your game again if you make a mistake!

In order to patch your ISO, you will need to use GCRebuilder to extract the game's main exectuable file, "PsoV3.dol". If you don't have GCRebuilder, you can find it in the GC downloads section of the main site. If you want a tutorial with pictures, you can find one in the GC guides section of the main site; otherwise, follow these steps:

1) Open GCRebuilder, select the "Image" option at the top, then select "Open". GCRebuilder will ask you to select an image to open. Navigate to the location of your PSO ISO file, select it, then click the "Open" button.

2) You will now see information about your PSO disc on the left side of the main GCRebuilder window, as well as a list of all the files on the disc on the right side of the main GCRebuilder window. The files are shown in alphabetical order by default, so use the scrollbar to scroll down until you find the file "PsoV3.dol".

Right click on the filename, and you'll get a small popup with the options "Import..." and "Export...". Click the "Export..." option, and then GCRebuilder will ask where you want to export this file. For simplicity, I suggest exporting it to C:\. Click the "Save" button to export PsoV3.dol to the folder you selected. We're done with GCRebuilder for the moment, but don't close it yet.

3) Now that we have extracted PsoV3.dol from the ISO, it's time to patch it. Run the patching program that matches the PSO disc you have, and then click the "..." button. A window will open asking you to select the "PsoV3.dol" file you want to patch. Navigate to C:\, and you should see the "PsoV3.dol" file you just extracted from your ISO. Select it, then click the "Open" button. I recommend unchecking the "Make a backup when possible" option, as you don't need a backup copy of "PsoV3.dol". Now press the "Start" button, and you should get confirmation that the file was successfully patched. When you close this message, the patching program will automatically close, too. You have now applied the patch, so it's time for the final step.

Before you begin the final step, you may want to apply other patches to your "PsoV3.dol" file. Once you've applied all of the patches you want to use, it's time to put the modified "PsoV3.dol" back into your ISO.

4) You should still have GCRebuilder open at this point, so this step is easy. Right click on "PsoV3.dol" in the GCRebuilder file list again, but this time, select the "Import..." option. A window will open asking you to select the file you want to import. Navigate to C:\ and select the "PsoV3.dol" file you patched in step 3. Click the "Open" button, and then you should get a confirmation window to indicate that the file import was successful.

That's it! You can now close GCRebuilder and use your patched PSO ISO file to play with Wii or Dolphin (or GC, if you have the necessary homebrew).

--------------------
Troubleshooting:
--------------------

If the patching program gives an error that says:

"PsoV3.dol - File size/version missmatch!"

then that means you tried to use a patching program that doesn't match your PSO disc. Double check which version of PSO GC you have and then select the patching program that matches your disc.

---------
Credits:
---------

Huge thanks go out to Ralf for helping me to make this patch, as I had no idea that each object had its own clipping threshold until he found several of them for me. After that, it was easy for me to find most of the others through simple testing.

That's the end of this README; I hope everyone enjoys being able to see objects from farther away now. Don't forget to visit PSO Palace, the home of this patch.

http://psopalace.funurl.com
_________________
"Fear the HUnewearl."
Aleron Ives- Socially-Devoid Member
- Number of posts : 2204
Age : 36
Registration date : 2008-03-24 -
![]()
![]()
Re: GC Patch Batch
![]() Aleron Ives Tue Apr 04, 2017 2:15 pm
Aleron Ives Tue Apr 04, 2017 2:15 pm
- Code:
Phantasy Star Online GC
Offline Map Patch
Patcher by: Aleron Ives
Patch by: Aleron Ives
http://psopalace.funurl.com

----------------
Introduction:
----------------

Welcome to the Offline Map Patch for PSO GC. The purpose of this patch is to enable the full Forest and Cave maps when playing the game in offline mode. Forest and Cave normally have fewer enemies offline than they do online, and this pack will enable the use of the fully populated online maps in offline mode, so there are more enemies to kill. This patch only affects the offline Forest and Cave maps; the offline Episode II maps are unchanged, as those maps are actually different from online mode, rather than simply having fewer enemies than the online maps, as is the case in Episode I.

--------------
Installation:
--------------

After downloading and unzipping the PSO_GC_Offline_Map_Patch.zip archive, you should have this README.txt file, as well a patching program. The Offline Map Patch is the same on every PSO GC disc, so which disc you have doesn't matter when it comes to installing this patch.

Always be sure to keep a clean backup copy of your ISO, so that you don't have to dump your game again if you make a mistake!

In order to patch your ISO, you will need to use GCRebuilder to extract the file "gsl_set_enemy.gsl". If you don't have GCRebuilder, you can find it in the GC downloads section of the main site. If you want a tutorial with pictures, you can find one in the GC guides section of the main site; otherwise, follow these steps:

1) Open GCRebuilder, select the "Image" option at the top, then select "Open". GCRebuilder will ask you to select an image to open. Navigate to the location of your PSO ISO file, select it, then click the "Open" button.

2) You will now see information about your PSO disc on the left side of the main GCRebuilder window, as well as a list of all the files on the disc on the right side of the main GCRebuilder window. The files are shown in alphabetical order by default, so use the scrollbar to scroll down until you find the file "gsl_set_enemy.gsl".

Right click on the filename, and you'll get a small popup with the options "Import..." and "Export...". Click the "Export..." option, and then GCRebuilder will ask where you want to export this file. For simplicity, I suggest exporting it to C:\. Click the "Save" button to export gsl_set_enemy.gsl to the folder you selected. We're done with GCRebuilder for the moment, but don't close it yet.

3) Now that we have extracted gsl_set_enemy.gsl from the ISO, it's time to patch it. Run the patching program, and then click the "..." button. A window will open asking you to select the "gsl_set_enemy.gsl" file you want to patch. Navigate to C:\, and you should see the "gsl_set_enemy.gsl" file you just extracted from your ISO. Select it, then click the "Open" button. I recommend unchecking the "Make a backup when possible" option, as you don't need a backup copy of "gsl_set_enemy.gsl". Now press the "Start" button, and you should get confirmation that the file was successfully patched. When you close this message, the patching program will automatically close, too. You have now applied the patch, so it's time for the final step.

4) You should still have GCRebuilder open at this point, so this step is easy. Right click on "gsl_set_enemy.gsl" in the GCRebuilder file list again, but this time, select the "Import..." option. A window will open asking you to select the file you want to import. Navigate to C:\ and select the "gsl_set_enemy.gsl" file you patched in step 3. Click the "Open" button, and then you should get a confirmation window to indicate that the file import was successful.

That's it! You can now close GCRebuilder and use your patched PSO ISO file to play with Wii or Dolphin (or GC, if you have the necessary homebrew).

--------------------
Troubleshooting:
--------------------

If the patching program gives an error that says:

"gsl_set_enemy.gsl - File size/version missmatch!"

then that means you tried to patch a file that isn't "gsl_set_enemy.gsl". Double check that you extracted the correct file from your PSO GC ISO.

---------
Credits:
---------

Thanks go out to Soly for providing some extra information about GSL files that helped me to double check that I was patching the file correctly.

That's the end of this README; I hope everyone enjoys being able to fight the full spawns in offline Forest and Cave. Don't forget to visit PSO Palace, the home of this patch.

http://psopalace.funurl.com
_________________
"Fear the HUnewearl."
Aleron Ives- Socially-Devoid Member
- Number of posts : 2204
Age : 36
Registration date : 2008-03-24 -
![]()
![]()
Re: GC Patch Batch
![]() Aleron Ives Mon Apr 24, 2017 2:49 pm
Aleron Ives Mon Apr 24, 2017 2:49 pm
- Code:
Phantasy Star Online GC
Ice Patch
Patcher by: Aleron Ives
Patch by: Ralf
http://psopalace.funurl.com

----------------
Introduction:
----------------

Welcome to the Ice Patch for PSO GC. This patch has two purposes: the first is to improve the terrible 20% cap on Blizzard's success rate in Ultimate mode, and the second is to improve the Gibarta Technique.

For Blizzard, the fact that ice weapon specials only work 1/5 of the time at best in Ultimate has meant that nobody had any use for Blizzard weapons, until now. This patch increases the Blizzard success rate cap to 60% in Ultimate, thus allowing Blizzard weapons to have a reasonable chance of working, while also making sure that Arrest weapons remain relevant. This patch therefore supersedes the old Blizzard Patch.

While Blizzard is only terrible in Ultimate without this patch, Gibarta is terrible in every difficulty. Its casting time is longer than that of any other Technique (even Grants and Megid!), which combined with its poor range at low levels makes it nearly impossible to use effectively. At high levels it remains slower than Rabarta, yet it has almost the same TP cost, so there is rarely any reason to ever use it, especially since Rabarta doesn't require aiming, whereas Gibarta does. This patch aims to improve Gibarta to the point where it is worthwhile to cast it.

This patch first changes Gibarta's casting speed to match the casting speed of Gizonde level-for-level, which allows you to cast it much more rapidly than before. In other words, if you have Gibarta at any particular level, it will cast at the same speed as Gizonde would at that same level. This is the same casting speed that Gibarta has in PSO Ver.2, so there is a precedent for making Gizonde and Gibarta have the same casting speed. The animation for Gibarta 26-30 has also been adjusted slightly to compensate for the increased casting speed.

This patch also increases Gibarta's ability to freeze enemies in Ultimate. Although Gibarta now casts more rapidly than Rabarta, it requires you to group the enemies into a line, and it still has problems similar to Launchers and Slicers where if you use it at point blank range, the projectiles fly into the air (or floor), instead of piercing. Rabarta has neither of these problems, yet its TP cost is nearly the same as Gibarta's. In order to compensate for these limitations, this patch gives Gibarta a 30% freezing rate in Ultimate, while Rabarta's freezing rate in Ultimate remains at 20%. As a result, even though Gibarta requires more effort to use effectively, it also has a greater freezing ability if you're willing to put in that effort.

--------------
Installation:
--------------

After downloading and unzipping the PSO_GC_Ice_Patch.zip archive, you should have this README.txt file, as well as six different patching programs. Each patching program is meant for one of the six possible PSO GC releases that you might have:

NTSC-J 1.02 (JP regular disc)
NTSC-J 1.05 (JP Plus disc)
NTSC-U 1.00 (US regular disc)
NTSC-U 1.01 (US regular disc)
NTSC-U 1.02 (US Plus disc)
PAL 1.00 (EU regular disc)

If you're not sure which version of the game you have, look at the inner ring on the bottom of your disc, and you should see one of these product numbers:

DOL-GPOJ-0-02 (JP 1.02)
DOL-GPOJ-0-05 (JP 1.05 Plus)
DOL-GPOE-0-00 (US 1.00)
DOL-GPOE-0-01 (US 1.01)
DOL-GPOE-0-02 (US 1.02 Plus)
DOL-GPOP-0-00 (EU 1.00)

You only need to use the patching program that matches the ISO dump of the disc you have.

Always be sure to keep a clean backup copy of your ISO, so that you don't have to dump your game again if you make a mistake!

In order to patch your ISO, you will need to use GCRebuilder to extract the game's main exectuable file, "PsoV3.dol". If you don't have GCRebuilder, you can find it in the GC downloads section of the main site. If you want a tutorial with pictures, you can find one in the GC guides section of the main site; otherwise, follow these steps:

1) Open GCRebuilder, select the "Image" option at the top, then select "Open". GCRebuilder will ask you to select an image to open. Navigate to the location of your PSO ISO file, select it, then click the "Open" button.

2) You will now see information about your PSO disc on the left side of the main GCRebuilder window, as well as a list of all the files on the disc on the right side of the main GCRebuilder window. The files are shown in alphabetical order by default, so use the scrollbar to scroll down until you find the file "PsoV3.dol".

Right click on the filename, and you'll get a small popup with the options "Import..." and "Export...". Click the "Export..." option, and then GCRebuilder will ask where you want to export this file. For simplicity, I suggest exporting it to C:\. Click the "Save" button to export PsoV3.dol to the folder you selected. We're done with GCRebuilder for the moment, but don't close it yet.

3) Now that we have extracted PsoV3.dol from the ISO, it's time to patch it. Run the patching program that matches the PSO disc you have, and then click the "..." button. A window will open asking you to select the "PsoV3.dol" file you want to patch. Navigate to C:\, and you should see the "PsoV3.dol" file you just extracted from your ISO. Select it, then click the "Open" button. I recommend unchecking the "Make a backup when possible" option, as you don't need a backup copy of "PsoV3.dol". Now press the "Start" button, and you should get confirmation that the file was successfully patched. When you close this message, the patching program will automatically close, too. You have now applied the patch, so it's time for the final step.

Before you begin the final step, you may want to apply other patches to your "PsoV3.dol" file. Once you've applied all of the patches you want to use, it's time to put the modified "PsoV3.dol" back into your ISO.

4) You should still have GCRebuilder open at this point, so this step is easy. Right click on "PsoV3.dol" in the GCRebuilder file list again, but this time, select the "Import..." option. A window will open asking you to select the file you want to import. Navigate to C:\ and select the "PsoV3.dol" file you patched in step 3. Click the "Open" button, and then you should get a confirmation window to indicate that the file import was successful.

That's it! You can now close GCRebuilder and use your patched PSO ISO file to play with Wii or Dolphin (or GC, if you have the necessary homebrew).

--------------------
Troubleshooting:
--------------------

If the patching program gives an error that says:

"PsoV3.dol - File size/version missmatch!"

then that means you tried to use a patching program that doesn't match your PSO disc. Double check which version of PSO GC you have and then select the patching program that matches your disc.

---------
Credits:
---------

Huge thanks go out to Ralf for making this patch, as there are very few people who have the experience needed to make patches for GC games. Ralf is also the first person to discover why Gibarta is so infamously terrible on GC (and BB) and to make Gibarta as useful as it is in PSO Ver.2 at long last.

That's the end of this README; I hope everyone enjoys being able to finally use Blizzard weapons and Gibarta. Don't forget to visit PSO Palace, the home of this patch.

http://psopalace.funurl.com
_________________
"Fear the HUnewearl."
Aleron Ives- Socially-Devoid Member
- Number of posts : 2204
Age : 36
Registration date : 2008-03-24 -
![]()
![]()
Re: GC Patch Batch
![]() Aleron Ives Mon May 15, 2017 10:05 pm
Aleron Ives Mon May 15, 2017 10:05 pm
_________________
"Fear the HUnewearl."
Aleron Ives- Socially-Devoid Member
- Number of posts : 2204
Age : 36
Registration date : 2008-03-24 -
![]()
![]()
Re: GC Patch Batch
![]() Noahater Thu Aug 03, 2017 11:23 am
Noahater Thu Aug 03, 2017 11:23 am
Noahater- Member

- Number of posts : 2
Registration date : 2017-08-02
![]()
![]()
Re: GC Patch Batch
![]() Aleron Ives Thu Aug 03, 2017 11:49 am
Aleron Ives Thu Aug 03, 2017 11:49 am
_________________
"Fear the HUnewearl."
Aleron Ives- Socially-Devoid Member
- Number of posts : 2204
Age : 36
Registration date : 2008-03-24 -
![]()
![]()
Re: GC Patch Batch
![]() Noahater Thu Aug 03, 2017 1:55 pm
Noahater Thu Aug 03, 2017 1:55 pm
Noahater- Member
- Number of posts : 2
Registration date : 2017-08-02
![]()
![]()
Wow!
![]() Nytesong Sat Oct 07, 2017 1:30 pm
Nytesong Sat Oct 07, 2017 1:30 pm
I actually got on PSO PC and ran thru the forest and was just shocked at how I still have my characters and the S-rank weapons we worked so hard for here, even after I lost my PSO PC save data multiple times. This is the best place to enjoy classic PSO!
Looking forward to getting the ball rolling on this again! Maybe i'll roll something that can use gibarta!

Nytesong- Active Member

- Number of posts : 63
Age : 42
Registration date : 2011-04-05
![]()
![]()
Re: GC Patch Batch
![]() Aleron Ives Sun Oct 15, 2017 10:13 pm
Aleron Ives Sun Oct 15, 2017 10:13 pm
Chat Patch
- Code:
Phantasy Star Online GC
Chat Patch
Patcher by: Aleron Ives
Patch by: Ralf
http://psopalace.funurl.com

----------------
Introduction:
----------------

Welcome to the Chat Patch for PSO GC. The purpose of this patch is to improve the game's chat mechanics. The main feature of this patch fixes the log window's automatic scrolling, which makes it extremely difficult to catch up on a conversation when other players are talking, because every time somebody speaks, the log automatically scrolls to the bottom, which prevents you from reading the rest of the log. With this patch, simply hold L+R when the log window is open to disable the automatic scrolling, and now you can use the directional pad to scroll up freely. Once you're done reading the log, simply release L+R to restore the automatic scrolling, so you can follow the current conversation again.

The secondary feature of this patch is to restore the ability to chat in colours using the /cc command on Sylverant, as in PSOv2. PSOGC normally strips colour codes out of chat bubbles and the log window, which prevents you from seeing coloured chat, but with this patch, colour codes are no longer removed. As an added bonus, Word Selects that appear on multiple lines in chat bubbles will now be properly spaced in the log window again.

Note that this patch will allow you to see when V2 players are using colour chat, and V2 players will also see when you are using colour chat, but only GC players who are using the patch will be able to see when you are using colour chat, since default GC clients will still remove the colour codes from your messages.

--------------
Installation:
--------------

After downloading and unzipping the PSO_GC_Chat_Patch.zip archive, you should have this README.txt file, as well as six different patching programs. Each patching program is meant for one of the six possible PSO GC releases that you might have:

NTSC-J 1.02 (JP regular disc)
NTSC-J 1.05 (JP Plus disc)
NTSC-U 1.00 (US regular disc)
NTSC-U 1.01 (US regular disc)
NTSC-U 1.02 (US Plus disc)
PAL 1.00 (EU regular disc)

If you're not sure which version of the game you have, look at the inner ring on the bottom of your disc, and you should see one of these product numbers:

DOL-GPOJ-0-02 (JP 1.02)
DOL-GPOJ-0-05 (JP 1.05 Plus)
DOL-GPOE-0-00 (US 1.00)
DOL-GPOE-0-01 (US 1.01)
DOL-GPOE-0-02 (US 1.02 Plus)
DOL-GPOP-0-00 (EU 1.00)

You only need to use the patching program that matches the ISO dump of the disc you have.

Always be sure to keep a clean backup copy of your ISO, so that you don't have to dump your game again if you make a mistake!

In order to patch your ISO, you will need to use GCRebuilder to extract the game's main exectuable file, "PsoV3.dol". If you don't have GCRebuilder, you can find it in the GC downloads section of the main site. If you want a tutorial with pictures, you can find one in the GC guides section of the main site; otherwise, follow these steps:

1) Open GCRebuilder, select the "Image" option at the top, then select "Open". GCRebuilder will ask you to select an image to open. Navigate to the location of your PSO ISO file, select it, then click the "Open" button.

2) You will now see information about your PSO disc on the left side of the main GCRebuilder window, as well as a list of all the files on the disc on the right side of the main GCRebuilder window. The files are shown in alphabetical order by default, so use the scrollbar to scroll down until you find the file "PsoV3.dol".

Right click on the filename, and you'll get a small popup with the options "Import..." and "Export...". Click the "Export..." option, and then GCRebuilder will ask where you want to export this file. For simplicity, I suggest exporting it to C:\. Click the "Save" button to export PsoV3.dol to the folder you selected. We're done with GCRebuilder for the moment, but don't close it yet.

3) Now that we have extracted PsoV3.dol from the ISO, it's time to patch it. Run the patching program that matches the PSO disc you have, and then click the "..." button. A window will open asking you to select the "PsoV3.dol" file you want to patch. Navigate to C:\, and you should see the "PsoV3.dol" file you just extracted from your ISO. Select it, then click the "Open" button. I recommend unchecking the "Make a backup when possible" option, as you don't need a backup copy of "PsoV3.dol". Now press the "Start" button, and you should get confirmation that the file was successfully patched. When you close this message, the patching program will automatically close, too. You have now applied the patch, so it's time for the final step.

Before you begin the final step, you may want to apply other patches to your "PsoV3.dol" file. Once you've applied all of the patches you want to use, it's time to put the modified "PsoV3.dol" back into your ISO.

4) You should still have GCRebuilder open at this point, so this step is easy. Right click on "PsoV3.dol" in the GCRebuilder file list again, but this time, select the "Import..." option. A window will open asking you to select the file you want to import. Navigate to C:\ and select the "PsoV3.dol" file you patched in step 3. Click the "Open" button, and then you should get a confirmation window to indicate that the file import was successful.

That's it! You can now close GCRebuilder and use your patched PSO ISO file to play with Wii or Dolphin (or GC, if you have the necessary homebrew).

--------------------
Troubleshooting:
--------------------

If the patching program gives an error that says:

"PsoV3.dol - File size/version missmatch!"

then that means you tried to use a patching program that doesn't match your PSO disc. Double check which version of PSO GC you have and then select the patching program that matches your disc.

---------
Credits:
---------

Huge thanks go out to Ralf for making this patch, as the automatic chat log scrolling has always been a huge hindrance to people trying to catch up on active conversations, and colour chat is always a nice way to have some harmless fun.

That's the end of this README; I hope everyone enjoys being able to finally pause the chat log and use shiny text. Don't forget to visit PSO Palace, the home of this patch.

http://psopalace.funurl.com
Event Music Patch
- Code:
Phantasy Star Online GC
Event Music Patch
Patcher by: Aleron Ives
Patch by: Ralf & Aleron Ives
http://psopalace.funurl.com

----------------
Introduction:
----------------

Welcome to the Event Music Patch for PSO GC. The purpose of this patch is to restore the special music on Pioneer 2 during online events, as in PSOv2. Sega added lobby events in PSOGC, and while they kept the Pioneer 2 event decorations, they removed the event music. With this patch, the music on Pioneer 2 will change during online events again. As an added bonus, the lobby theme for the Sonic event is now "Live & Learn", as "Open Your Heart" is used on Pioneer 2.

--------------
Installation:
--------------

After downloading and unzipping the PSO_GC_Event_Music_Patch.zip archive, you should have this README.txt file, as well as six different patching programs. Each patching program is meant for one of the six possible PSO GC releases that you might have:

NTSC-J 1.02 (JP regular disc)
NTSC-J 1.05 (JP Plus disc)
NTSC-U 1.00 (US regular disc)
NTSC-U 1.01 (US regular disc)
NTSC-U 1.02 (US Plus disc)
PAL 1.00 (EU regular disc)

If you're not sure which version of the game you have, look at the inner ring on the bottom of your disc, and you should see one of these product numbers:

DOL-GPOJ-0-02 (JP 1.02)
DOL-GPOJ-0-05 (JP 1.05 Plus)
DOL-GPOE-0-00 (US 1.00)
DOL-GPOE-0-01 (US 1.01)
DOL-GPOE-0-02 (US 1.02 Plus)
DOL-GPOP-0-00 (EU 1.00)

You only need to use the patching program that matches the ISO dump of the disc you have.

Always be sure to keep a clean backup copy of your ISO, so that you don't have to dump your game again if you make a mistake!

In order to patch your ISO, you will need to use GCRebuilder to extract the game's main exectuable file, "PsoV3.dol". If you don't have GCRebuilder, you can find it in the GC downloads section of the main site. If you want a tutorial with pictures, you can find one in the GC guides section of the main site; otherwise, follow these steps:

1) Open GCRebuilder, select the "Image" option at the top, then select "Open". GCRebuilder will ask you to select an image to open. Navigate to the location of your PSO ISO file, select it, then click the "Open" button.

2) You will now see information about your PSO disc on the left side of the main GCRebuilder window, as well as a list of all the files on the disc on the right side of the main GCRebuilder window. The files are shown in alphabetical order by default, so use the scrollbar to scroll down until you find the file "PsoV3.dol".

Right click on the filename, and you'll get a small popup with the options "Import..." and "Export...". Click the "Export..." option, and then GCRebuilder will ask where you want to export this file. For simplicity, I suggest exporting it to C:\. Click the "Save" button to export PsoV3.dol to the folder you selected. We're done with GCRebuilder for the moment, but don't close it yet.

3) Now that we have extracted PsoV3.dol from the ISO, it's time to patch it. Run the patching program that matches the PSO disc you have, and then click the "..." button. A window will open asking you to select the "PsoV3.dol" file you want to patch. Navigate to C:\, and you should see the "PsoV3.dol" file you just extracted from your ISO. Select it, then click the "Open" button. I recommend unchecking the "Make a backup when possible" option, as you don't need a backup copy of "PsoV3.dol". Now press the "Start" button, and you should get confirmation that the file was successfully patched. When you close this message, the patching program will automatically close, too. You have now applied the patch, so it's time for the final step.

Before you begin the final step, you may want to apply other patches to your "PsoV3.dol" file. Once you've applied all of the patches you want to use, it's time to put the modified "PsoV3.dol" back into your ISO.

4) You should still have GCRebuilder open at this point, so this step is easy. Right click on "PsoV3.dol" in the GCRebuilder file list again, but this time, select the "Import..." option. A window will open asking you to select the file you want to import. Navigate to C:\ and select the "PsoV3.dol" file you patched in step 3. Click the "Open" button, and then you should get a confirmation window to indicate that the file import was successful.

That's it! You can now close GCRebuilder and use your patched PSO ISO file to play with Wii or Dolphin (or GC, if you have the necessary homebrew).

--------------------
Troubleshooting:
--------------------

If the patching program gives an error that says:

"PsoV3.dol - File size/version missmatch!"

then that means you tried to use a patching program that doesn't match your PSO disc. Double check which version of PSO GC you have and then select the patching program that matches your disc.

---------
Credits:
---------

Huge thanks go out to Ralf for making this patch, as Pioneer 2 is much more festive when it has appropriate music to match the decorations.

That's the end of this README; I hope everyone enjoys being able to finally hear the in-game event music again. Don't forget to visit PSO Palace, the home of this patch.

http://psopalace.funurl.com
_________________
"Fear the HUnewearl."
Aleron Ives- Socially-Devoid Member
- Number of posts : 2204
Age : 36
Registration date : 2008-03-24 -
![]()
![]()
Re: GC Patch Batch
![]() Aleron Ives Sat Oct 21, 2017 12:48 am
Aleron Ives Sat Oct 21, 2017 12:48 am
- Spoiler:
Such horrible censorship!
Ah, much better!
- Code:
Phantasy Star Online GC
Atari Patch
Patcher by: Aleron Ives
Patch by: Aleron Ives
http://psopalace.funurl.com
----------------
Introduction:
----------------
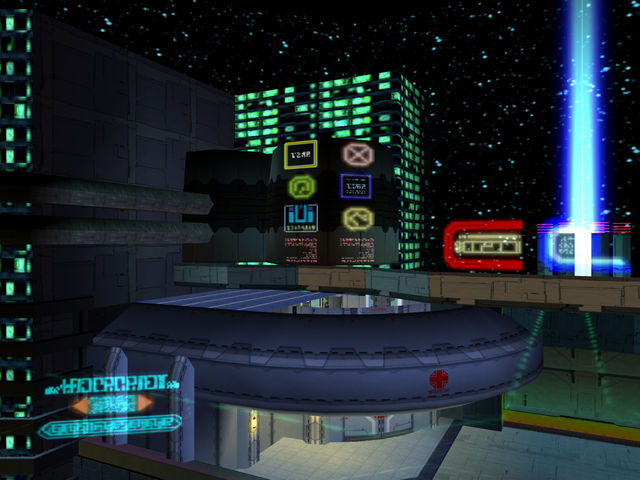
Welcome to the Atari Patch for PSO GC. The purpose of this patch is simple: it restores the Atari logo above the hospital on Pioneer 2. All Dreamcast versions have the Atari logo, and the Japanese releases of PSO GC have it too, but the Western (US and EU) GameCube releases do not, most likely because Nintendo of America told Sega to remove it. This patch will replace the generic symbol above the hospital with the original Atari logo that Sega had used in previous PSO releases.
--------------
Installation:
--------------
After downloading and unzipping the PSO_GC_Atari_Patch.zip archive, you should have this README.txt file, as well as two patching programs. The Atari Patch is the same on every Western PSO GC disc, so which disc you have doesn't matter when it comes to installing this patch, as long as it isn't a Japanese release. If you have a Japanese copy of PSO (regular or Plus), then you do not need this patch at all, as your disc already has the Atari logo on Pioneer 2.
Always be sure to keep a clean backup copy of your ISO, so that you don't have to dump your game again if you make a mistake!
In order to patch your ISO, you will need to use GCRebuilder to extract the files "map_acity00.GVM" and "map_city00.GVM", which are located inside the "Scene" folder. Patching both files is required to get the Atari logo in both Normal/Hard/Very Hard and Ultimate. If you don't have GCRebuilder, you can find it in the GC downloads section of the main site. If you want a tutorial with pictures, you can find one in the GC guides section of the main site; otherwise, follow these steps:
1) Open GCRebuilder, select the "Image" option at the top, then select "Open". GCRebuilder will ask you to select an image to open. Navigate to the location of your PSO ISO file, select it, then click the "Open" button.
2) You will now see information about your PSO disc on the left side of the main GCRebuilder window, as well as a list of all the files on the disc on the right side of the main GCRebuilder window. The files are shown in alphabetical order by default, so use the scrollbar to scroll down until you find the folder named "Scene".
Click on the + icon to the left of the folder icon to show the contents of the "Scene" folder, then scroll down. You will need to repeat the steps below for the following 2 files:
map_acity00.GVM
map_city00.GVM
Right click on the "map_acity00.GVM" filename, and you'll get a small popup with the options "Import..." and "Export...". Click the "Export..." option, and then GCRebuilder will ask where you want to export this file. For simplicity, I suggest exporting it to C:\. Click the "Save" button to export map_acity00.GVM to the folder you selected, then follow the same process to also extract map_city00.GVM. We're done with GCRebuilder for the moment, but don't close it yet.
3) Now that we have extracted map_acity00.GVM and map_city00.GVM from the ISO, it's time to patch them. First, run the "PSO_GC_Atari_Patch_(Normal).exe" patching program, and then click the "..." button. A window will open asking you to select the "map_city00.GVM" file you want to patch. Navigate to C:\, and you should see the "map_city00.GVM" file you just extracted from your ISO. Select it, then click the "Open" button. I recommend unchecking the "Make a backup when possible" option, as you don't need a backup copy of "map_city00.GVM". Now press the "Start" button, and you should get confirmation that the file was successfully patched. When you close this message, the patching program will automatically close, too.
Now run the "PSO_GC_Atari_Patch_(Ultimate).exe" patching program, and repeat the above steps to patch the "map_acity00.GVM" file you extracted from your ISO. You have now applied the patch to both files, so it's time for the final step.
4) You should still have GCRebuilder open at this point, so this step is easy. Right click on "map_city00.GVM" in the GCRebuilder file list again, but this time, select the "Import..." option. A window will open asking you to select the file you want to import. Navigate to C:\ and select the "map_city00.GVM" file you patched in step 3. Click the "Open" button, and then you should get a confirmation window to indicate that the file import was successful.
Now right click on "map_acity00.GVM" in the GCRebuilder file list, select the "Import..." option again, and choose to import the "map_acity00.GVM" file you patched in step 3.
That's it! You can now close GCRebuilder and use your patched PSO ISO file to play with Wii or Dolphin (or GC, if you have the necessary homebrew).
--------------------
Troubleshooting:
--------------------
If the patching programs give an error that says:
"map_city00.GVM - File size/version missmatch!"
then that means you tried to patch a file that isn't "map_city00.GVM". Double check that you extracted the correct file from your PSO GC ISO.
---------
Credits:
---------
Thanks go out to Sega for not removing the Atari logo in Japanese releases of PSO GC, as that made this patch easier to do and of higher visual quality than if I had converted the DC Atari logo texture to GC format.
That's the end of this README; I hope everyone enjoys seeing the Atari logo on Pioneer 2 again. Don't forget to visit PSO Palace, the home of this patch.
http://psopalace.funurl.com
_________________
"Fear the HUnewearl."
Aleron Ives- Socially-Devoid Member
- Number of posts : 2204
Age : 36
Registration date : 2008-03-24 -
![]()
![]()
Re: GC Patch Batch
![]() Aleron Ives Thu Jan 18, 2018 3:35 am
Aleron Ives Thu Jan 18, 2018 3:35 am
Radar Map Patch
- Code:
Phantasy Star Online GC
Radar Map Patch
Patcher by: Aleron Ives
Patch by: Ralf & Aleron Ives
http://psopalace.funurl.com

----------------
Introduction:
----------------

Welcome to the Radar Map Patch for PSO GC. The purpose of this patch is to improve the in-game maps. The patch comes in two forms: the main patch significantly raises the sizes of the mini map, area map, and splitscreen map to let you see more of your surroundings, but the map frames are more translucent to reduce the impact of the larger maps on the screen. These larger maps necessitate some UI changes in order to fit, such as moving the Challenge area window to the left side of the screen above the HUD, as there isn't enough room for it to look good above the larger mini map.

If you prefer to avoid HUD changes, an alternative patch is also included that provides a more modest increase to the sizes of the area and splitscreen maps. The alternative patch tries to improve the map functionality without compromising any of the existing HUD aesthetics or boundaries, so unlike the main patch, the mini map is unchanged, and the splitscreen map compass has been left disabled.

Both patches increase the zooming abilities of the area map and splitscreen map, so the map is more useful for navigation than before. The delay before the splitscreen map starts to zoom when holding L/R has also been increased to four seconds to reduce the likelihood of zooming the map by accident when you're playing with the map open.

Both patches also include the increased map icon draw distance from the Draw Distance Patch, as the new maps are less beneficial with the default draw distance on doors and enemies. The increased draw distance is the same as with the Draw Distance Patch, so you can apply either patch on top of the other safely, but you may wish to use this patch without the Draw Distance Patch in splitscreen mode to improve performance if you experience extra slowdown with the Draw Distance Patch on real GameCube hardware.

-NOTE-

You should keep a backup of your PsoV3.dol file if you wish to try both the main and alternative map patches, as they are separate and are not compatible with each other!

--------------
Installation:
--------------

After downloading and unzipping the PSO_GC_Radar_Map_Patch.zip archive, you should have this README.txt file, as well as two folders. The "Main" folder contains the main patch, and the "Alt" folder contains the alternative patch. Each folder contains six different patching programs. Each patching program is meant for one of the six possible PSO GC releases that you might have:

NTSC-J 1.02 (JP regular disc)
NTSC-J 1.05 (JP Plus disc)
NTSC-U 1.00 (US regular disc)
NTSC-U 1.01 (US regular disc)
NTSC-U 1.02 (US Plus disc)
PAL 1.00 (EU regular disc)

If you're not sure which version of the game you have, look at the inner ring on the bottom of your disc, and you should see one of these product numbers:

DOL-GPOJ-0-02 (JP 1.02)
DOL-GPOJ-0-05 (JP 1.05 Plus)
DOL-GPOE-0-00 (US 1.00)
DOL-GPOE-0-01 (US 1.01)
DOL-GPOE-0-02 (US 1.02 Plus)
DOL-GPOP-0-00 (EU 1.00)

You only need to use the patching program that matches the ISO dump of the disc you have.

Always be sure to keep a clean backup copy of your ISO, so that you don't have to dump your game again if you make a mistake!

In order to patch your ISO, you will need to use GCRebuilder to extract the game's main exectuable file, "PsoV3.dol". If you don't have GCRebuilder, you can find it in the GC downloads section of the main site. If you want a tutorial with pictures, you can find one in the GC guides section of the main site; otherwise, follow these steps:

1) Open GCRebuilder, select the "Image" option at the top, then select "Open". GCRebuilder will ask you to select an image to open. Navigate to the location of your PSO ISO file, select it, then click the "Open" button.

2) You will now see information about your PSO disc on the left side of the main GCRebuilder window, as well as a list of all the files on the disc on the right side of the main GCRebuilder window. The files are shown in alphabetical order by default, so use the scrollbar to scroll down until you find the file "PsoV3.dol".

Right click on the filename, and you'll get a small popup with the options "Import..." and "Export...". Click the "Export..." option, and then GCRebuilder will ask where you want to export this file. For simplicity, I suggest exporting it to C:\. Click the "Save" button to export PsoV3.dol to the folder you selected. We're done with GCRebuilder for the moment, but don't close it yet.

3) Now that we have extracted PsoV3.dol from the ISO, it's time to patch it. Run the patching program that matches the PSO disc you have, and then click the "..." button. A window will open asking you to select the "PsoV3.dol" file you want to patch. Navigate to C:\, and you should see the "PsoV3.dol" file you just extracted from your ISO. Select it, then click the "Open" button. I recommend unchecking the "Make a backup when possible" option, as you don't need a backup copy of "PsoV3.dol" (unless you want to try both map patches). Now press the "Start" button, and you should get confirmation that the file was successfully patched. When you close this message, the patching program will automatically close, too. You have now applied the patch, so it's time for the final step.

Before you begin the final step, you may want to apply other patches to your "PsoV3.dol" file. Once you've applied all of the patches you want to use, it's time to put the modified "PsoV3.dol" back into your ISO.

4) You should still have GCRebuilder open at this point, so this step is easy. Right click on "PsoV3.dol" in the GCRebuilder file list again, but this time, select the "Import..." option. A window will open asking you to select the file you want to import. Navigate to C:\ and select the "PsoV3.dol" file you patched in step 3. Click the "Open" button, and then you should get a confirmation window to indicate that the file import was successful.

That's it! You can now close GCRebuilder and use your patched PSO ISO file to play with Wii or Dolphin (or GC, if you have the necessary homebrew).

--------------------
Troubleshooting:
--------------------

If the patching program gives an error that says:

"PsoV3.dol - File size/version missmatch!"

then that means you tried to use a patching program that doesn't match your PSO disc. Double check which version of PSO GC you have and then select the patching program that matches your disc.

---------
Credits:
---------

Huge thanks go out to Ralf for documenting how the game's map system works, as the default map sizes do not utilise the available screen space very well, and there are very few people who have the experience needed to find things like this in GC games.

That's the end of this README; I hope everyone enjoys the new map functionality. Don't forget to visit PSO Palace, the home of this patch.

http://psopalace.funurl.com
Rare Alert Patch
- Code:
Phantasy Star Online GC
Rare Alert Patch
Patcher by: Aleron Ives
Patch by: Ralf & Aleron Ives
http://psopalace.funurl.com

----------------
Introduction:
----------------

Welcome to the Rare Alert Patch for PSO GC. This purpose of this patch is to make it easier to tell when rare items have dropped during gameplay. To that end, this patch makes rare items appear as red dots on the radar map, and it also plays a chime when a rare item drops. Note that all items with red boxes will appear on the map, but only items that have just dropped from a monster or item crate will trigger the chime.

--------------
Installation:
--------------

After downloading and unzipping the PSO_GC_Rare_Alert_Patch.zip archive, you should have this README.txt file, as well as six different patching programs. Each patching program is meant for one of the six possible PSO GC releases that you might have:

NTSC-J 1.02 (JP regular disc)
NTSC-J 1.05 (JP Plus disc)
NTSC-U 1.00 (US regular disc)
NTSC-U 1.01 (US regular disc)
NTSC-U 1.02 (US Plus disc)
PAL 1.00 (EU regular disc)

If you're not sure which version of the game you have, look at the inner ring on the bottom of your disc, and you should see one of these product numbers:

DOL-GPOJ-0-02 (JP 1.02)
DOL-GPOJ-0-05 (JP 1.05 Plus)
DOL-GPOE-0-00 (US 1.00)
DOL-GPOE-0-01 (US 1.01)
DOL-GPOE-0-02 (US 1.02 Plus)
DOL-GPOP-0-00 (EU 1.00)

You only need to use the patching program that matches the ISO dump of the disc you have.

Always be sure to keep a clean backup copy of your ISO, so that you don't have to dump your game again if you make a mistake!

In order to patch your ISO, you will need to use GCRebuilder to extract the game's main exectuable file, "PsoV3.dol". If you don't have GCRebuilder, you can find it in the GC downloads section of the main site. If you want a tutorial with pictures, you can find one in the GC guides section of the main site; otherwise, follow these steps:

1) Open GCRebuilder, select the "Image" option at the top, then select "Open". GCRebuilder will ask you to select an image to open. Navigate to the location of your PSO ISO file, select it, then click the "Open" button.

2) You will now see information about your PSO disc on the left side of the main GCRebuilder window, as well as a list of all the files on the disc on the right side of the main GCRebuilder window. The files are shown in alphabetical order by default, so use the scrollbar to scroll down until you find the file "PsoV3.dol".

Right click on the filename, and you'll get a small popup with the options "Import..." and "Export...". Click the "Export..." option, and then GCRebuilder will ask where you want to export this file. For simplicity, I suggest exporting it to C:\. Click the "Save" button to export PsoV3.dol to the folder you selected. We're done with GCRebuilder for the moment, but don't close it yet.

3) Now that we have extracted PsoV3.dol from the ISO, it's time to patch it. Run the patching program that matches the PSO disc you have, and then click the "..." button. A window will open asking you to select the "PsoV3.dol" file you want to patch. Navigate to C:\, and you should see the "PsoV3.dol" file you just extracted from your ISO. Select it, then click the "Open" button. I recommend unchecking the "Make a backup when possible" option, as you don't need a backup copy of "PsoV3.dol". Now press the "Start" button, and you should get confirmation that the file was successfully patched. When you close this message, the patching program will automatically close, too. You have now applied the patch, so it's time for the final step.

Before you begin the final step, you may want to apply other patches to your "PsoV3.dol" file. Once you've applied all of the patches you want to use, it's time to put the modified "PsoV3.dol" back into your ISO.

4) You should still have GCRebuilder open at this point, so this step is easy. Right click on "PsoV3.dol" in the GCRebuilder file list again, but this time, select the "Import..." option. A window will open asking you to select the file you want to import. Navigate to C:\ and select the "PsoV3.dol" file you patched in step 3. Click the "Open" button, and then you should get a confirmation window to indicate that the file import was successful.

That's it! You can now close GCRebuilder and use your patched PSO ISO file to play with Wii or Dolphin (or GC, if you have the necessary homebrew).

--------------------
Troubleshooting:
--------------------

If the patching program gives an error that says:

"PsoV3.dol - File size/version missmatch!"

then that means you tried to use a patching program that doesn't match your PSO disc. Double check which version of PSO GC you have and then select the patching program that matches your disc.

---------
Credits:
---------

Huge thanks go out to Ralf for making this patch, as it can be difficult to tell when items have dropped when monsters are swarming everywhere, and there are very few people who have the experience needed to find things like this in GC games.

That's the end of this README; I hope everyone enjoys being able to easily locate red boxes in Seabed at long last. =P Don't forget to visit PSO Palace, the home of this patch.

http://psopalace.funurl.com
Widescreen Patch
- Code:
Phantasy Star Online GC
Widescreen Patch
Patcher by: Aleron Ives
Patch by: Ralf
http://psopalace.funurl.com

----------------
Introduction:
----------------

Welcome to the Widescreen Patch for PSO GC. The purpose of this patch is simple: it lets you play the game in widescreen with the choice of using 16:10, 16:9, or 21:9. The patch forces the game to render additional 3D geometry on the left and right sides of the screen, so when you stretch the image to a widescreen aspect ratio, the 3D elements won't be distorted. Keep in mind that this patch does not affect the game's 2D assets, so the HUD and menus will still be distorted, and the distortion at 21:9 is significantly greater than at 16:10.

--------------
Installation:
--------------

After downloading and unzipping the PSO_GC_Widescreen_Patch.zip archive, you should have this README.txt file, as well as six different patching programs per aspect ratio. Each patching program is meant for one of the six possible PSO GC releases that you might have:

NTSC-J 1.02 (JP regular disc)
NTSC-J 1.05 (JP Plus disc)
NTSC-U 1.00 (US regular disc)
NTSC-U 1.01 (US regular disc)
NTSC-U 1.02 (US Plus disc)
PAL 1.00 (EU regular disc)

If you're not sure which version of the game you have, look at the inner ring on the bottom of your disc, and you should see one of these product numbers:

DOL-GPOJ-0-02 (JP 1.02)
DOL-GPOJ-0-05 (JP 1.05 Plus)
DOL-GPOE-0-00 (US 1.00)
DOL-GPOE-0-01 (US 1.01)
DOL-GPOE-0-02 (US 1.02 Plus)
DOL-GPOP-0-00 (EU 1.00)

You only need to use the patching program that matches the ISO dump of the disc you have.

Always be sure to keep a clean backup copy of your ISO, so that you don't have to dump your game again if you make a mistake!

In order to patch your ISO, you will need to use GCRebuilder to extract the game's main exectuable file, "PsoV3.dol". If you don't have GCRebuilder, you can find it in the GC downloads section of the main site. If you want a tutorial with pictures, you can find one in the GC guides section of the main site; otherwise, follow these steps:

1) Open GCRebuilder, select the "Image" option at the top, then select "Open". GCRebuilder will ask you to select an image to open. Navigate to the location of your PSO ISO file, select it, then click the "Open" button.

2) You will now see information about your PSO disc on the left side of the main GCRebuilder window, as well as a list of all the files on the disc on the right side of the main GCRebuilder window. The files are shown in alphabetical order by default, so use the scrollbar to scroll down until you find the file "PsoV3.dol".

Right click on the filename, and you'll get a small popup with the options "Import..." and "Export...". Click the "Export..." option, and then GCRebuilder will ask where you want to export this file. For simplicity, I suggest exporting it to C:\. Click the "Save" button to export PsoV3.dol to the folder you selected. We're done with GCRebuilder for the moment, but don't close it yet.

3) Now that we have extracted PsoV3.dol from the ISO, it's time to patch it. Run the patching program that matches the PSO disc you have, and then click the "..." button. A window will open asking you to select the "PsoV3.dol" file you want to patch. Navigate to C:\, and you should see the "PsoV3.dol" file you just extracted from your ISO. Select it, then click the "Open" button. I recommend unchecking the "Make a backup when possible" option, as you don't need a backup copy of "PsoV3.dol". Now press the "Start" button, and you should get confirmation that the file was successfully patched. When you close this message, the patching program will automatically close, too. You have now applied the patch, so it's time for the final step.

Before you begin the final step, you may want to apply other patches to your "PsoV3.dol" file. Once you've applied all of the patches you want to use, it's time to put the modified "PsoV3.dol" back into your ISO.

4) You should still have GCRebuilder open at this point, so this step is easy. Right click on "PsoV3.dol" in the GCRebuilder file list again, but this time, select the "Import..." option. A window will open asking you to select the file you want to import. Navigate to C:\ and select the "PsoV3.dol" file you patched in step 3. Click the "Open" button, and then you should get a confirmation window to indicate that the file import was successful.

That's it! You can now close GCRebuilder and use your patched PSO ISO file to play with Wii or Dolphin (or GC, if you have the necessary homebrew).

--------------------
Troubleshooting:
--------------------

If the patching program gives an error that says:

"PsoV3.dol - File size/version missmatch!"

then that means you tried to use a patching program that doesn't match your PSO disc. Double check which version of PSO GC you have and then select the patching program that matches your disc.

---------
Credits:
---------

Thanks go out to Ralf for making this patch, as most people want to play the game in widescreen these days, and there are very few people who have the experience needed to find things like this in GC games.

That's the end of this README; I hope everyone enjoys being able to play in widescreen without having to use Dolphin's widescreen hack. Don't forget to visit PSO Palace, the home of this patch.

http://psopalace.funurl.com
_________________
"Fear the HUnewearl."
Aleron Ives- Socially-Devoid Member
- Number of posts : 2204
Age : 36
Registration date : 2008-03-24 -
![]()
![]()
Re: GC Patch Batch
![]() Aleron Ives Sat Apr 28, 2018 4:17 am
Aleron Ives Sat Apr 28, 2018 4:17 am
- Spoiler:

Stop treating me like a child, Sega.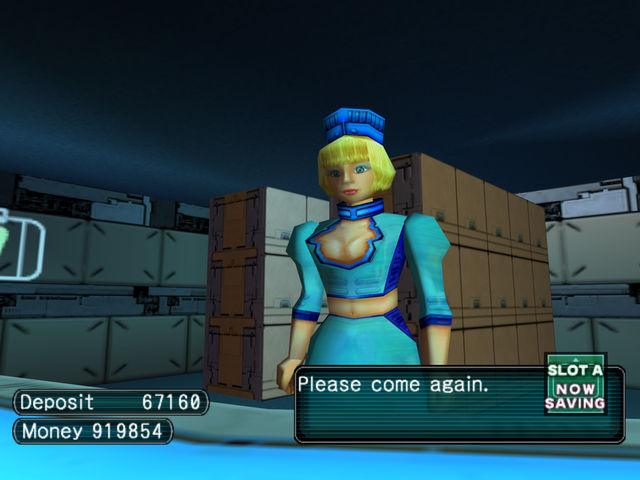
The RESPONSIBILITY... it FLOWS through me!
- Code:
Phantasy Star Online GC
Save Icon Patch
Patcher by: Aleron Ives
Patch by: Aleron Ives & Ralf
http://psopalace.funurl.com

----------------
Introduction:
----------------

Welcome to the Save Icon Patch for PSO GC. The purpose of this patch is simple: it removes the warning text underneath the "NOW SAVING" icon for Western (US and EU) releases of PSO GC. Japanese discs do not display the "Do not touch the Memory Card or the POWER Button." text when the game saves, so apparently either Sega or Nintendo thinks that only Western players are morons who need to be reminded not to eat their memory cards every time they save the game. This patch eliminates the annoying text, repositions the saving icon, and resizes the "Quit Game" saving windows to align them with the new icon position.

--------------
Installation:
--------------

After downloading and unzipping the PSO_GC_Save_Icon_Patch.zip archive, you should have this README.txt file, as well as four different patching programs. Unlike most patches, this patch does not apply to Japanese releases of PSO GC, as they already lack the warning text when you save the game. Each patching program is meant for one of the four possible Western PSO GC releases that you might have:

NTSC-U 1.00 (US regular disc)
NTSC-U 1.01 (US regular disc)
NTSC-U 1.02 (US Plus disc)
PAL 1.00 (EU regular disc)

If you're not sure which version of the game you have, look at the inner ring on the bottom of your disc, and you should see one of these product numbers:

DOL-GPOE-0-00 (US 1.00)
DOL-GPOE-0-01 (US 1.01)
DOL-GPOE-0-02 (US 1.02 Plus)
DOL-GPOP-0-00 (EU 1.00)

You only need to use the patching program that matches the ISO dump of the disc you have.

Always be sure to keep a clean backup copy of your ISO, so that you don't have to dump your game again if you make a mistake!

In order to patch your ISO, you will need to use GCRebuilder to extract the game's main exectuable file, "PsoV3.dol". If you don't have GCRebuilder, you can find it in the GC downloads section of the main site. If you want a tutorial with pictures, you can find one in the GC guides section of the main site; otherwise, follow these steps:

1) Open GCRebuilder, select the "Image" option at the top, then select "Open". GCRebuilder will ask you to select an image to open. Navigate to the location of your PSO ISO file, select it, then click the "Open" button.

2) You will now see information about your PSO disc on the left side of the main GCRebuilder window, as well as a list of all the files on the disc on the right side of the main GCRebuilder window. The files are shown in alphabetical order by default, so use the scrollbar to scroll down until you find the file "PsoV3.dol".

Right click on the filename, and you'll get a small popup with the options "Import..." and "Export...". Click the "Export..." option, and then GCRebuilder will ask where you want to export this file. For simplicity, I suggest exporting it to C:\. Click the "Save" button to export PsoV3.dol to the folder you selected. We're done with GCRebuilder for the moment, but don't close it yet.

3) Now that we have extracted PsoV3.dol from the ISO, it's time to patch it. Run the patching program that matches the PSO disc you have, and then click the "..." button. A window will open asking you to select the "PsoV3.dol" file you want to patch. Navigate to C:\, and you should see the "PsoV3.dol" file you just extracted from your ISO. Select it, then click the "Open" button. I recommend unchecking the "Make a backup when possible" option, as you don't need a backup copy of "PsoV3.dol". Now press the "Start" button, and you should get confirmation that the file was successfully patched. When you close this message, the patching program will automatically close, too. You have now applied the patch, so it's time for the final step.

Before you begin the final step, you may want to apply other patches to your "PsoV3.dol" file. Once you've applied all of the patches you want to use, it's time to put the modified "PsoV3.dol" back into your ISO.

4) You should still have GCRebuilder open at this point, so this step is easy. Right click on "PsoV3.dol" in the GCRebuilder file list again, but this time, select the "Import..." option. A window will open asking you to select the file you want to import. Navigate to C:\ and select the "PsoV3.dol" file you patched in step 3. Click the "Open" button, and then you should get a confirmation window to indicate that the file import was successful.

That's it! You can now close GCRebuilder and use your patched PSO ISO file to play with Wii or Dolphin (or GC, if you have the necessary homebrew).

--------------------
Troubleshooting:
--------------------

If the patching program gives an error that says:

"PsoV3.dol - File size/version missmatch!"

then that means you tried to use a patching program that doesn't match your PSO disc. Double check which version of PSO GC you have and then select the patching program that matches your disc.

---------
Credits:
---------

Special thanks go out to Ralf for finding a clean and simple way to eliminate the warning text.

That's the end of this README; I hope everyone enjoys not being treated like an idiot anymore every time they save the game. Don't forget to visit PSO Palace, the home of this patch.

http://psopalace.funurl.com
In addition, all patches except the Draw Distance Patch, Radar Map Patch, and Widescreen Patch have been updated to support Japanese 1.03 discs. This is the edition of PSO GC that's branded as version "1.1" on the disc and the title screen.
_________________
"Fear the HUnewearl."
Aleron Ives- Socially-Devoid Member
- Number of posts : 2204
Age : 36
Registration date : 2008-03-24 -
![]()
![]()
Re: GC Patch Batch
![]() Aleron Ives Thu May 31, 2018 2:54 am
Aleron Ives Thu May 31, 2018 2:54 am
The Reticle Patch is also available if you want to have Dreamcast- or Xbox-style targetting reticles to go with your newfound plethora of available buttons.
Palette Patch
- Code:
Phantasy Star Online GC
Palette Patch
Patcher by: Aleron Ives
Patch by: Ralf & Aleron Ives
http://psopalace.funurl.com

----------------
Introduction:
----------------

Welcome to the Palette Patch for PSO GC. The purpose of this patch is to address the game's limited control scheme: although there are dozens of different actions you can use, you only have six buttons to work with, and as a result, many Techniques in particular get ignored simply because there is no easy way to access them. This patch addresses the problem by increasing the number of Action Palettes from one to four: instead of the standard six actions you can map, you can now map up to 24 different actions to the same controller (6 buttons x 4 palettes).

In addition, this patch addresses the problem of accidentally using Photon Blasts by allowing you to manually map Photon Blast icons to any buttons you want. Your mag will no longer override any of your assigned actions when your PB meter reaches 100, so you don't have to worry about using a PB by mistake when you really meant to use whatever action is normally mapped to that button.

Because this patch is more complex than other patches, some explanation is required in order for you to know how to use it. There are two separate versions of the patch; one version uses the C-stick, and the other uses the D-pad. The C-stick patch uses the C-stick to control the extra palettes, while the D-pad continues to support chat shortcuts. The D-pad patch uses the D-pad to control the extra palettes, while the C-stick continues to support chat shortcuts. Regardless of which version of the patch you use, both the C-stick and the D-pad remain fully functional for menu navigation.

The following instructions are for the C-stick version of the patch; if you are using the D-pad version of the patch, simply swap all instances of C-stick and D-pad, as both patches work in the same way.

---------------
Instructions:
---------------

1) Select the Customize option from the main menu. This will open the Action Menu, which allows you to pick which of your six buttons you want to configure. Use the D-pad to pick one of the buttons, and then press the A button to open the Action List, which allows you to select which action you want to assign to that button. Once you have selected an action to map to this button, repeat the process to configure all six buttons on this palette as usual.

2) Once you have configured all six buttons, you must save this palette as one of your four palettes. Each palette is assigned to a direction on the C-stick -- up, down, left, or right. For instance, if you want to save this palette to C-stick up, hold L+R, press up on the C-stick to save the palette, and then release L+R.

3) Use the Action Menu to assign six new actions to your palette.

4) Once you have configured all six buttons, save them using a direction on the C-stick that you haven't used yet. For instance, hold L+R and press down on the C-stick to save this palette as the C-stick down palette.

5) Notice that there are Photon Blast icons at the bottom of the Action List. If you want to be able to use Photon Blasts, you must assign at least one PB icon to a dedicated button. When you reach 100 PB, the icon will illuminate and become usable, assuming your equipped mag knows the Photon Blast you assigned to your palette. The rest of the time, the button will do nothing. In this way, you sacrifice 1-3 buttons for dedicated PB functionality in exchange for not losing 12/24 buttons when your mag has 100 PB.

6) Repeat steps 3 and 4 to save actions to the C-stick left palette and the C-stick right palette, including any Photon Blasts you want to be able to use.

7) Once you have configured all four palettes, press up, down, left, and right on the C-stick *without* holding L+R to cycle through each one. When you are satisfied with your button assignments, proceed to Ragol.

 You can now access each of your four palettes by pressing up, down, left, or right on the C-stick whenever the Action Palette is open. All six buttons will instantly be replaced with the actions you assigned to the palette earlier.

Your configured palettes will remain until you change characters, at which point they will be erased. Whichever palette is active when you quit the game will be saved to the memory card, and the other three palettes will be lost, as there is no space in the save file to store the extra palettes. You must therefore configure your palettes whenever you load a different character.

-NOTE-

The Palette Patch does not work properly in splitscreen multiplayer. You can still use splitscreen mode transfer items between characters, but if you actually want to play the game in multi mode, you should play without the patch.

-TIPS-

1) Experiment until you find an ideal way to configure all four palettes, and then use that configuration on all of your characters to make it easier to remember which button does what.

2) You can map the same action to more than one palette. For instance, since androids do not have Techniques, you could configure the first palette with attacks and mates, the second palette with attacks and atomizers, the third palette with attacks and traps, and the fourth palette with attacks and Photon Blasts. The game is only aware of the currently active palette, so you can duplicate actions across palettes if having certain actions in more than one place is convenient.

3) If you're a Force who won't reach 100 PB before your teammates chain their Photon Blasts together, don't bother mapping any Photon Blasts to your palette, as you can always donate PB, instead.

4) If you're carrying multiple mags, you can map all six Photon Blasts to your palette at once, and then you won't have to reconfigure your palettes in the middle of a run when you change mags.

--------------
Installation:
--------------

After downloading and unzipping the PSO_GC_Palette_Patch.zip archive, you should have this README.txt file, as well as seven different patching programs. Each patching program is meant for one of the seven possible PSO GC releases that you might have:

NTSC-J 1.02 (JP regular disc)
NTSC-J 1.03 (JP regular disc)
NTSC-J 1.05 (JP Plus disc)
NTSC-U 1.00 (US regular disc)
NTSC-U 1.01 (US regular disc)
NTSC-U 1.02 (US Plus disc)
PAL 1.00 (EU regular disc)

If you're not sure which version of the game you have, look at the inner ring on the bottom of your disc, and you should see one of these product numbers:

DOL-GPOJ-0-02 (JP 1.02)
DOL-GPOJ-0-03 (JP 1.03)
DOL-GPOJ-0-05 (JP 1.05 Plus)
DOL-GPOE-0-00 (US 1.00)
DOL-GPOE-0-01 (US 1.01)
DOL-GPOE-0-02 (US 1.02 Plus)
DOL-GPOP-0-00 (EU 1.00)

You only need to use the patching program that matches the ISO dump of the disc you have.

Always be sure to keep a clean backup copy of your ISO, so that you don't have to dump your game again if you make a mistake!

In order to patch your ISO, you will need to use GCRebuilder to extract the game's main exectuable file, "PsoV3.dol". If you don't have GCRebuilder, you can find it in the GC downloads section of the main site. If you want a tutorial with pictures, you can find one in the GC guides section of the main site; otherwise, follow these steps:

1) Open GCRebuilder, select the "Image" option at the top, then select "Open". GCRebuilder will ask you to select an image to open. Navigate to the location of your PSO ISO file, select it, then click the "Open" button.

2) You will now see information about your PSO disc on the left side of the main GCRebuilder window, as well as a list of all the files on the disc on the right side of the main GCRebuilder window. The files are shown in alphabetical order by default, so use the scrollbar to scroll down until you find the file "PsoV3.dol".

Right click on the filename, and you'll get a small popup with the options "Import..." and "Export...". Click the "Export..." option, and then GCRebuilder will ask where you want to export this file. For simplicity, I suggest exporting it to C:\. Click the "Save" button to export PsoV3.dol to the folder you selected. We're done with GCRebuilder for the moment, but don't close it yet.

3) Now that we have extracted PsoV3.dol from the ISO, it's time to patch it. Run the patching program that matches the PSO disc you have, and then click the "..." button. A window will open asking you to select the "PsoV3.dol" file you want to patch. Navigate to C:\, and you should see the "PsoV3.dol" file you just extracted from your ISO. Select it, then click the "Open" button. I recommend unchecking the "Make a backup when possible" option, as you don't need a backup copy of "PsoV3.dol". Now press the "Start" button, and you should get confirmation that the file was successfully patched. When you close this message, the patching program will automatically close, too. You have now applied the patch, so it's time for the final step.

Before you begin the final step, you may want to apply other patches to your "PsoV3.dol" file. Once you've applied all of the patches you want to use, it's time to put the modified "PsoV3.dol" back into your ISO.

4) You should still have GCRebuilder open at this point, so this step is easy. Right click on "PsoV3.dol" in the GCRebuilder file list again, but this time, select the "Import..." option. A window will open asking you to select the file you want to import. Navigate to C:\ and select the "PsoV3.dol" file you patched in step 3. Click the "Open" button, and then you should get a confirmation window to indicate that the file import was successful.

That's it! You can now close GCRebuilder and use your patched PSO ISO file to play with Wii or Dolphin (or GC, if you have the necessary homebrew).

--------------------
Troubleshooting:
--------------------

If the patching program gives an error that says:

"PsoV3.dol - File size/version missmatch!"

then that means you tried to use a patching program that doesn't match your PSO disc. Double check which version of PSO GC you have and then select the patching program that matches your disc.

---------
Credits:
---------

Huge thanks go out to Ralf for making this patch, as the game's lack of button assignments has been a problem since day one on the Dreamcast. The Quick Menu improved the game significantly, but it still wasn't enough to let you access every Technique at a moment's notice. With this patch, Forces in particular can finally use spells to their fullest potential.

That's the end of this README; I hope everyone enjoys no longer having to use Rafoie on individual enemies because they can't access Foie without slogging through a menu. Don't forget to visit PSO Palace, the home of this patch.

http://psopalace.funurl.com
Reticle Patch
- Code:
Phantasy Star Online GC
Reticle Patch
Patcher by: Aleron Ives
Patch by: Ralf & Aleron Ives
http://psopalace.funurl.com

----------------
Introduction:
----------------

Welcome to the Reticle Patch for PSO GC. The purpose of this patch is to make the targetting reticles match the buttons on your controller, as both Wii and Dolphin players are able to play with controllers other than the GameCube controller.

The default GameCube reticle colours are:

A: Green
B: Red
X: Grey

The Dreamcast patch changes the reticles to match the colours of a Dreamcast controller:

A: Red
B: Blue
X: Yellow

The Xbox patch changes the reticles to match the colours of an Xbox controller:

A: Green
B: Red
X: Blue

This way, the targetting reticles will match whichever controller layout you are most familiar with.

-NOTE-

You should keep a backup of your PsoV3.dol file if you wish to try both the Dreamcast and Xbox reticle patches, as they are separate and are not compatible with each other!

--------------
Installation:
--------------

After downloading and unzipping the PSO_GC_Reticle_Patch.zip archive, you should have this README.txt file, as well as two folders. The "Dreamcast" folder contains the Dreamcast patch, and the "Xbox" folder contains the Xbox patch. Each folder contains seven different patching programs. Each patching program is meant for one of the seven possible PSO GC releases that you might have:

NTSC-J 1.02 (JP regular disc)
NTSC-J 1.03 (JP regular disc)
NTSC-J 1.05 (JP Plus disc)
NTSC-U 1.00 (US regular disc)
NTSC-U 1.01 (US regular disc)
NTSC-U 1.02 (US Plus disc)
PAL 1.00 (EU regular disc)

If you're not sure which version of the game you have, look at the inner ring on the bottom of your disc, and you should see one of these product numbers:

DOL-GPOJ-0-02 (JP 1.02)
DOL-GPOJ-0-03 (JP 1.03)
DOL-GPOJ-0-05 (JP 1.05 Plus)
DOL-GPOE-0-00 (US 1.00)
DOL-GPOE-0-01 (US 1.01)
DOL-GPOE-0-02 (US 1.02 Plus)
DOL-GPOP-0-00 (EU 1.00)

You only need to use the patching program that matches the ISO dump of the disc you have.

Always be sure to keep a clean backup copy of your ISO, so that you don't have to dump your game again if you make a mistake!

In order to patch your ISO, you will need to use GCRebuilder to extract the game's main exectuable file, "PsoV3.dol". If you don't have GCRebuilder, you can find it in the GC downloads section of the main site. If you want a tutorial with pictures, you can find one in the GC guides section of the main site; otherwise, follow these steps:

1) Open GCRebuilder, select the "Image" option at the top, then select "Open". GCRebuilder will ask you to select an image to open. Navigate to the location of your PSO ISO file, select it, then click the "Open" button.

2) You will now see information about your PSO disc on the left side of the main GCRebuilder window, as well as a list of all the files on the disc on the right side of the main GCRebuilder window. The files are shown in alphabetical order by default, so use the scrollbar to scroll down until you find the file "PsoV3.dol".

Right click on the filename, and you'll get a small popup with the options "Import..." and "Export...". Click the "Export..." option, and then GCRebuilder will ask where you want to export this file. For simplicity, I suggest exporting it to C:\. Click the "Save" button to export PsoV3.dol to the folder you selected. We're done with GCRebuilder for the moment, but don't close it yet.

3) Now that we have extracted PsoV3.dol from the ISO, it's time to patch it. Run the patching program that matches the PSO disc you have, and then click the "..." button. A window will open asking you to select the "PsoV3.dol" file you want to patch. Navigate to C:\, and you should see the "PsoV3.dol" file you just extracted from your ISO. Select it, then click the "Open" button. I recommend unchecking the "Make a backup when possible" option, as you don't need a backup copy of "PsoV3.dol" (unless you want to try both reticle patches). Now press the "Start" button, and you should get confirmation that the file was successfully patched. When you close this message, the patching program will automatically close, too. You have now applied the patch, so it's time for the final step.

Before you begin the final step, you may want to apply other patches to your "PsoV3.dol" file. Once you've applied all of the patches you want to use, it's time to put the modified "PsoV3.dol" back into your ISO.

4) You should still have GCRebuilder open at this point, so this step is easy. Right click on "PsoV3.dol" in the GCRebuilder file list again, but this time, select the "Import..." option. A window will open asking you to select the file you want to import. Navigate to C:\ and select the "PsoV3.dol" file you patched in step 3. Click the "Open" button, and then you should get a confirmation window to indicate that the file import was successful.

That's it! You can now close GCRebuilder and use your patched PSO ISO file to play with Wii or Dolphin (or GC, if you have the necessary homebrew).

--------------------
Troubleshooting:
--------------------

If the patching program gives an error that says:

"PsoV3.dol - File size/version missmatch!"

then that means you tried to use a patching program that doesn't match your PSO disc. Double check which version of PSO GC you have and then select the patching program that matches your disc.

---------
Credits:
---------

Thanks go out to Ralf for finding how Sega stores the reticle colours, as people have been searching for them in vain for years.

That's the end of this README; I hope everyone enjoys the new reticles. Don't forget to visit PSO Palace, the home of this patch.

http://psopalace.funurl.com
_________________
"Fear the HUnewearl."
Aleron Ives- Socially-Devoid Member
- Number of posts : 2204
Age : 36
Registration date : 2008-03-24 -
![]()
![]()
Re: GC Patch Batch
![]() Aleron Ives Sun Jul 29, 2018 2:08 am
Aleron Ives Sun Jul 29, 2018 2:08 am
- Code:
Phantasy Star Online GC
Mag Alert Patch
Patcher by: Aleron Ives
Patch by: Ralf
http://psopalace.funurl.com

----------------
Introduction:
----------------

Welcome to the Mag Alert Patch for PSO GC. The purpose of this patch is to make it easier to tell when your Mag is hungry. Whenever your Mag is ready to eat another three items, this patch plays the Mag feeding (bar movement) sound effect to remind you to check the Mag menu. If you are carrying multiple Mags, you will hear only one sound effect at first, because all of your Mags will get hungry at the same time if you just created a new team. Once you start feeding your Mags, each Mag will trigger its own SFX when it becomes hungry again.

--------------
Installation:
--------------

After downloading and unzipping the PSO_GC_Mag_Alert_Patch.zip archive, you should have this README.txt file, as well as seven different patching programs. Each patching program is meant for one of the seven possible PSO GC releases that you might have:

NTSC-J 1.02 (JP regular disc)
NTSC-J 1.03 (JP regular disc)
NTSC-J 1.05 (JP Plus disc)
NTSC-U 1.00 (US regular disc)
NTSC-U 1.01 (US regular disc)
NTSC-U 1.02 (US Plus disc)
PAL 1.00 (EU regular disc)

If you're not sure which version of the game you have, look at the inner ring on the bottom of your disc, and you should see one of these product numbers:

DOL-GPOJ-0-02 (JP 1.02)
DOL-GPOJ-0-03 (JP 1.03)
DOL-GPOJ-0-05 (JP 1.05 Plus)
DOL-GPOE-0-00 (US 1.00)
DOL-GPOE-0-01 (US 1.01)
DOL-GPOE-0-02 (US 1.02 Plus)
DOL-GPOP-0-00 (EU 1.00)

You only need to use the patching program that matches the ISO dump of the disc you have.

Always be sure to keep a clean backup copy of your ISO, so that you don't have to dump your game again if you make a mistake!

In order to patch your ISO, you will need to use GCRebuilder to extract the game's main exectuable file, "PsoV3.dol". If you don't have GCRebuilder, you can find it in the GC downloads section of the main site. If you want a tutorial with pictures, you can find one in the GC guides section of the main site; otherwise, follow these steps:

1) Open GCRebuilder, select the "Image" option at the top, then select "Open". GCRebuilder will ask you to select an image to open. Navigate to the location of your PSO ISO file, select it, then click the "Open" button.

2) You will now see information about your PSO disc on the left side of the main GCRebuilder window, as well as a list of all the files on the disc on the right side of the main GCRebuilder window. The files are shown in alphabetical order by default, so use the scrollbar to scroll down until you find the file "PsoV3.dol".

Right click on the filename, and you'll get a small popup with the options "Import..." and "Export...". Click the "Export..." option, and then GCRebuilder will ask where you want to export this file. For simplicity, I suggest exporting it to C:\. Click the "Save" button to export PsoV3.dol to the folder you selected. We're done with GCRebuilder for the moment, but don't close it yet.

3) Now that we have extracted PsoV3.dol from the ISO, it's time to patch it. Run the patching program that matches the PSO disc you have, and then click the "..." button. A window will open asking you to select the "PsoV3.dol" file you want to patch. Navigate to C:\, and you should see the "PsoV3.dol" file you just extracted from your ISO. Select it, then click the "Open" button. I recommend unchecking the "Make a backup when possible" option, as you don't need a backup copy of "PsoV3.dol". Now press the "Start" button, and you should get confirmation that the file was successfully patched. When you close this message, the patching program will automatically close, too. You have now applied the patch, so it's time for the final step.

Before you begin the final step, you may want to apply other patches to your "PsoV3.dol" file. Once you've applied all of the patches you want to use, it's time to put the modified "PsoV3.dol" back into your ISO.

4) You should still have GCRebuilder open at this point, so this step is easy. Right click on "PsoV3.dol" in the GCRebuilder file list again, but this time, select the "Import..." option. A window will open asking you to select the file you want to import. Navigate to C:\ and select the "PsoV3.dol" file you patched in step 3. Click the "Open" button, and then you should get a confirmation window to indicate that the file import was successful.

That's it! You can now close GCRebuilder and use your patched PSO ISO file to play with Wii or Dolphin (or GC, if you have the necessary homebrew).

--------------------
Troubleshooting:
--------------------

If the patching program gives an error that says:

"PsoV3.dol - File size/version missmatch!"

then that means you tried to use a patching program that doesn't match your PSO disc. Double check which version of PSO GC you have and then select the patching program that matches your disc.

---------
Credits:
---------

Huge thanks go out to Ralf for making this patch, as not knowing when it's time to feed your Mag has been the bane of Mag farmers since the release of PSOv1, and there are very few people who have the experience needed to find things like this in GC games.

That's the end of this README; I hope everyone enjoys not having to use a Mag timer anymore. Don't forget to visit PSO Palace, the home of this patch.

http://psopalace.funurl.com
In addition, the Draw Distance Patch, Radar Map Patch, and Widescreen Patch have been updated to support Japanese 1.03 discs. This is the edition of PSO GC that's branded as version "1.1" on the disc and the title screen.
_________________
"Fear the HUnewearl."
Aleron Ives- Socially-Devoid Member
- Number of posts : 2204
Age : 36
Registration date : 2008-03-24 -
![]()
![]()
Re: GC Patch Batch
![]() Aleron Ives Sun Aug 26, 2018 2:24 am
Aleron Ives Sun Aug 26, 2018 2:24 am
_________________
"Fear the HUnewearl."
Aleron Ives- Socially-Devoid Member
- Number of posts : 2204
Age : 36
Registration date : 2008-03-24 -
![]()
![]()
Re: GC Patch Batch
![]() Aleron Ives Sun Sep 09, 2018 1:57 am
Aleron Ives Sun Sep 09, 2018 1:57 am
_________________
"Fear the HUnewearl."
Aleron Ives- Socially-Devoid Member
- Number of posts : 2204
Age : 36
Registration date : 2008-03-24 -
![]()
![]()
Re: GC Patch Batch
![]() Aleron Ives Mon Oct 08, 2018 2:07 am
Aleron Ives Mon Oct 08, 2018 2:07 am
- Code:
Phantasy Star Online GC
Progressive Patch
Patcher by: Aleron Ives
Patch by: Ralf
http://psopalace.funurl.com

----------------
Introduction:
----------------

Welcome to the Progressive Patch for PSO GC. This patch allows the PAL release of PSO to output a progressive video signal to improve the quality of the displayed image. NTSC (US and JP) discs do not need this patch, as they already have the ability to output in progressive mode. When you connect a component cable (or a Wii 2 HDMI adapter) to your Wii, PSO will automatically ask if you want to use progressive mode. If you say yes, the game will display in 480p/60Hz mode. If you say no, the game will display in 480i/60Hz mode. If you use a composite cable, the game will automatically display in 480i/60Hz mode, as a composite cable cannot carry a progressive video signal. Unlike the NTSC discs, you do not need to hold the B button when the game starts to make the prompt appear.

Note that this patch eliminates the PAL 576i/50Hz mode and forces PSO to use NTSC video modes, as the game does not contain any settings for a PAL 480p/60Hz mode, so your TV must be capable of displaying an NTSC signal to use this patch. The progressive prompt screen uses NTSC 480i/60Hz, instead of PAL 576i/50Hz, as well.

Also note that this patch has no effect on the video quality in Dolphin, as Dolphin displays all games progressively by default. The only reason to use this patch with Dolphin is so you don't have to say yes to the PAL 60Hz prompt every time you start the game, as the game will start in NTSC 60Hz mode automatically. Leaving the "Enable Progressive Scan" option unchecked will cause Dolphin to tell PSO that a composite cable is connected, so you won't see the progressive prompt when you start the game, either.

--------------
Installation:
--------------

After downloading and unzipping the PSO_GC_Progressive_Patch.zip archive, you should have this README.txt file, as well as one patching program. Unlike most patches, this patch only applies to the European/PAL release of PSO GC, as NTSC discs already support progressive output. The patching program will only work with the PAL 1.00 (EU regular disc) release of PSO GC.

If you're not sure whether your disc is PAL, look at the inner ring on the bottom of your disc, and you should see this product number:

DOL-GPOP-0-00 (EU 1.00)

If you have a different disc, then you don't need this patch.

Always be sure to keep a clean backup copy of your ISO, so that you don't have to dump your game again if you make a mistake!

In order to patch your ISO, you will need to use GCRebuilder to extract the game's main exectuable file, "PsoV3.dol". If you don't have GCRebuilder, you can find it in the GC downloads section of the main site. If you want a tutorial with pictures, you can find one in the GC guides section of the main site; otherwise, follow these steps:

1) Open GCRebuilder, select the "Image" option at the top, then select "Open". GCRebuilder will ask you to select an image to open. Navigate to the location of your PSO ISO file, select it, then click the "Open" button.

2) You will now see information about your PSO disc on the left side of the main GCRebuilder window, as well as a list of all the files on the disc on the right side of the main GCRebuilder window. The files are shown in alphabetical order by default, so use the scrollbar to scroll down until you find the file "PsoV3.dol".

Right click on the filename, and you'll get a small popup with the options "Import..." and "Export...". Click the "Export..." option, and then GCRebuilder will ask where you want to export this file. For simplicity, I suggest exporting it to C:\. Click the "Save" button to export PsoV3.dol to the folder you selected. We're done with GCRebuilder for the moment, but don't close it yet.

3) Now that we have extracted PsoV3.dol from the ISO, it's time to patch it. Run the patching program that matches the PSO disc you have, and then click the "..." button. A window will open asking you to select the "PsoV3.dol" file you want to patch. Navigate to C:\, and you should see the "PsoV3.dol" file you just extracted from your ISO. Select it, then click the "Open" button. I recommend unchecking the "Make a backup when possible" option, as you don't need a backup copy of "PsoV3.dol". Now press the "Start" button, and you should get confirmation that the file was successfully patched. When you close this message, the patching program will automatically close, too. You have now applied the patch, so it's time for the final step.

Before you begin the final step, you may want to apply other patches to your "PsoV3.dol" file. Once you've applied all of the patches you want to use, it's time to put the modified "PsoV3.dol" back into your ISO.

4) You should still have GCRebuilder open at this point, so this step is easy. Right click on "PsoV3.dol" in the GCRebuilder file list again, but this time, select the "Import..." option. A window will open asking you to select the file you want to import. Navigate to C:\ and select the "PsoV3.dol" file you patched in step 3. Click the "Open" button, and then you should get a confirmation window to indicate that the file import was successful.

That's it! You can now close GCRebuilder and use your patched PSO ISO file to play with Wii or Dolphin (or GC, if you have the necessary homebrew).

--------------------
Troubleshooting:
--------------------

If the patching program gives an error that says:

"PsoV3.dol - File size/version missmatch!"

then that means you tried to use a patching program that doesn't match your PSO disc. Double check whether you have a PAL copy of PSO.

---------
Credits:
---------

Special thanks go out to Ralf for finding a way to output 480p in another PAL game, as most PAL GC games don't natively support progressive output.

That's the end of this README; I hope everyone enjoys having a crisper image from their Wii. Don't forget to visit PSO Palace, the home of this patch.

http://psopalace.funurl.com
_________________
"Fear the HUnewearl."
Aleron Ives- Socially-Devoid Member
- Number of posts : 2204
Age : 36
Registration date : 2008-03-24 -
![]()
![]()
Re: GC Patch Batch
![]() Aleron Ives Fri Dec 21, 2018 5:45 pm
Aleron Ives Fri Dec 21, 2018 5:45 pm
- Code:
Phantasy Star Online GC
Common Bank Patch
Patcher by: Aleron Ives
Patch by: Ralf
http://psopalace.funurl.com

----------------
Introduction:
----------------

Welcome to the Common Bank Patch for PSO GC. The purpose of this patch is make it easier to transfer items between characters on the same memory card. This patch gives you an extra bank that all four characters can access, so you can deposit an item with one character, switch to another character, and then withdraw the item again. This way, you don't have to use multi mode for most item transfers.

Using the patch is simple:

*To access the common bank, hold R when you talk to the counter.
*To access your regular character bank, don't hold R when you talk to the counter.

To switch from one bank to the other, you must back out of the bank menu and then talk to the bank again. The common bank holds 200 items, just as regular character banks do.

Note that you cannot access the common bank in multi mode, so if you want to transfer items to a character on a different memory card, you must withdraw the items from the common bank in single mode before you start your multi mode session.

---ATTENTION---

This patch uses temporary slot 3 to store the common bank data. As a result, you can no longer use temporary slot 3 to store a character from another memory card. You can still play multi mode, but you will only have 2 temporary slots to use after you apply this patch. In order to play a game with four players in splitscreen, two characters must come from the slot A memory card.

BE SURE TEMPORARY SLOT 3 IS EMPTY BEFORE YOU APPLY THIS PATCH!

--------------
Installation:
--------------

After downloading and unzipping the PSO_GC_Common_Bank_Patch.zip archive, you should have this README.txt file, as well as seven different patching programs. Each patching program is meant for one of the seven possible PSO GC releases that you might have:

NTSC-J 1.02 (JP regular disc)
NTSC-J 1.03 (JP regular disc)
NTSC-J 1.05 (JP Plus disc)
NTSC-U 1.00 (US regular disc)
NTSC-U 1.01 (US regular disc)
NTSC-U 1.02 (US Plus disc)
PAL 1.00 (EU regular disc)

If you're not sure which version of the game you have, look at the inner ring on the bottom of your disc, and you should see one of these product numbers:

DOL-GPOJ-0-02 (JP 1.02)
DOL-GPOJ-0-03 (JP 1.03)
DOL-GPOJ-0-05 (JP 1.05 Plus)
DOL-GPOE-0-00 (US 1.00)
DOL-GPOE-0-01 (US 1.01)
DOL-GPOE-0-02 (US 1.02 Plus)
DOL-GPOP-0-00 (EU 1.00)

You only need to use the patching program that matches the ISO dump of the disc you have.

Always be sure to keep a clean backup copy of your ISO, so that you don't have to dump your game again if you make a mistake!

In order to patch your ISO, you will need to use GCRebuilder to extract the game's main exectuable file, "PsoV3.dol". If you don't have GCRebuilder, you can find it in the GC downloads section of the main site. If you want a tutorial with pictures, you can find one in the GC guides section of the main site; otherwise, follow these steps:

1) Open GCRebuilder, select the "Image" option at the top, then select "Open". GCRebuilder will ask you to select an image to open. Navigate to the location of your PSO ISO file, select it, then click the "Open" button.

2) You will now see information about your PSO disc on the left side of the main GCRebuilder window, as well as a list of all the files on the disc on the right side of the main GCRebuilder window. The files are shown in alphabetical order by default, so use the scrollbar to scroll down until you find the file "PsoV3.dol".

Right click on the filename, and you'll get a small popup with the options "Import..." and "Export...". Click the "Export..." option, and then GCRebuilder will ask where you want to export this file. For simplicity, I suggest exporting it to C:\. Click the "Save" button to export PsoV3.dol to the folder you selected. We're done with GCRebuilder for the moment, but don't close it yet.

3) Now that we have extracted PsoV3.dol from the ISO, it's time to patch it. Run the patching program that matches the PSO disc you have, and then click the "..." button. A window will open asking you to select the "PsoV3.dol" file you want to patch. Navigate to C:\, and you should see the "PsoV3.dol" file you just extracted from your ISO. Select it, then click the "Open" button. I recommend unchecking the "Make a backup when possible" option, as you don't need a backup copy of "PsoV3.dol". Now press the "Start" button, and you should get confirmation that the file was successfully patched. When you close this message, the patching program will automatically close, too. You have now applied the patch, so it's time for the final step.

Before you begin the final step, you may want to apply other patches to your "PsoV3.dol" file. Once you've applied all of the patches you want to use, it's time to put the modified "PsoV3.dol" back into your ISO.

4) You should still have GCRebuilder open at this point, so this step is easy. Right click on "PsoV3.dol" in the GCRebuilder file list again, but this time, select the "Import..." option. A window will open asking you to select the file you want to import. Navigate to C:\ and select the "PsoV3.dol" file you patched in step 3. Click the "Open" button, and then you should get a confirmation window to indicate that the file import was successful.

That's it! You can now close GCRebuilder and use your patched PSO ISO file to play with Wii or Dolphin (or GC, if you have the necessary homebrew).

--------------------
Troubleshooting:
--------------------

If the patching program gives an error that says:

"PsoV3.dol - File size/version missmatch!"

then that means you tried to use a patching program that doesn't match your PSO disc. Double check which version of PSO GC you have and then select the patching program that matches your disc.

---------
Credits:
---------

Huge thanks go out to Ralf for making this patch, as nobody expected that PSO GC would ever have such a convenient BB feature.

That's the end of this README; I hope everyone enjoys having an easier way to transfer items. Don't forget to visit PSO Palace, the home of this patch.

http://psopalace.funurl.com
_________________
"Fear the HUnewearl."
Aleron Ives- Socially-Devoid Member
- Number of posts : 2204
Age : 36
Registration date : 2008-03-24 -
![]()
![]()
Re: GC Patch Batch
![]() Aleron Ives Fri Jan 11, 2019 11:13 pm
Aleron Ives Fri Jan 11, 2019 11:13 pm
v1.2
- Splitscreen mode is fixed and can be played normally now.
- Humans and newmans can map traps to their palettes for Battle mode.
- Palettes no longer get erased when you change characters, so you don't have to reconfigure your buttons as often.
v2.0
- Palettes are saved to the memory card + the improvements from v1.2.
As with the Common Bank Patch, v2.0 uses temporary slot 3 to store the extra palettes, so you won't be able to use temporary slot 3 to transfer a character from another memory card anymore. If you don't want to give up temporary slot 3, then you can use v1.2.
- Code:
Phantasy Star Online GC
Palette Patch 2.0
Patcher by: Aleron Ives
Patch by: Ralf & Aleron Ives
http://psopalace.funurl.com

----------------
Introduction:
----------------

Welcome to the Palette Patch for PSO GC. The purpose of this patch is to address the game's limited control scheme: although there are dozens of different actions you can use, you only have six buttons to work with, and as a result, many Techniques in particular get ignored simply because there is no easy way to access them. This patch addresses the problem by increasing the number of Action Palettes from one to four: instead of the standard six actions you can map, you can now map up to 24 different actions to the same controller (6 buttons x 4 palettes).

In addition, this patch addresses the problem of accidentally using Photon Blasts by allowing you to manually map Photon Blast icons to any buttons you want. Your Mag will no longer override any of your assigned actions when your PB meter reaches 100, so you don't have to worry about using a PB by mistake when you really meant to use whatever action is normally mapped to that button.

Because this patch is more complex than other patches, some explanation is required in order for you to know how to use it. The patch uses the C-stick to control the extra palettes, while the D-pad continues to support chat shortcuts. Both the C-stick and the D-pad remain fully functional for menu navigation.

There are two separate versions of the patch: version 2.0 allows you to save your extra palettes to the memory card, so you no longer have to remap your actions whenever you start a game session. Version 1.2 works like previous versions of the patch and does not save your palettes to the memory card.

-NOTE-

You can upgrade from version 1.2 to 2.0, but you cannot downgrade from 2.0 to 1.2, so you should keep a backup of your PsoV3.dol file if you're not sure which version you want to use.

---ATTENTION---

Version 2.0 of this patch uses temporary slot 3 to save the extra palettes. As a result, you can no longer use temporary slot 3 to store a character from another memory card. You can still play multi mode, but you will only have 2 temporary slots to use after you apply this patch. In order to play a game with four players in splitscreen, two characters must come from the slot A memory card.

If you don't want to lose temporarly slot 3, you can use patch version 1.2, which does not save the extra palettes to the memory card.

BE SURE TEMPORARY SLOT 3 IS EMPTY BEFORE YOU APPLY PATCH VERSION 2.0!

---------------
Instructions:
---------------

1) Select the Customize option from the main menu. This will open the Action Menu, which allows you to pick which of your six buttons you want to configure. Use the D-pad to pick one of the buttons, and then press the A button to open the Action List, which allows you to select which action you want to assign to that button. Once you have selected an action to map to this button, repeat the process to configure all six buttons on this palette as usual.

2) Once you have configured all six buttons, you must save this palette as one of your four palettes. Each palette is assigned to a direction on the C-stick -- up, down, left, or right. For instance, if you want to save this palette to C-stick up, hold L+R, press up on the C-stick to save the palette, and then release L+R.

3) Use the Action Menu to assign six new actions to your palette.

4) Once you have configured all six buttons, save them using a direction on the C-stick that you haven't used yet. For instance, hold L+R and press down on the C-stick to save this palette as the C-stick down palette.

5) Notice that there are Photon Blast icons at the bottom of the Action List. If you want to be able to use Photon Blasts, you must assign at least one PB icon to a dedicated button. When you reach 100 PB, the icon will illuminate and become usable, assuming your equipped Mag knows the Photon Blast you assigned to your palette. The rest of the time, the button will do nothing. In this way, you sacrifice 1-3 buttons for dedicated PB functionality in exchange for not losing 12/24 buttons when your Mag has 100 PB.

6) Repeat steps 3 and 4 to save actions to the C-stick left palette and the C-stick right palette, including any Photon Blasts you want to be able to use.

7) Once you have configured all four palettes, press up, down, left, and right on the C-stick *without* holding L+R to cycle through each one. When you are satisfied with your button assignments, proceed to Ragol.

 You can now access each of your four palettes by pressing up, down, left, or right on the C-stick whenever the Action Palette is open. All six buttons will instantly be replaced with the actions you assigned to the palette earlier.

If you use patch version 1.2, your configured palettes will remain until you power off the console. Whichever palette is active when you quit the game will be saved to the memory card, and the other three palettes will be lost. You must therefore configure your palettes whenever you start a new session and load your first character. Your configured palettes will remain when you change characters, so if you use the same layout on multiple characters, you won't have to configure your buttons again during the same session.

If you use patch version 2.0, your configured palettes will be saved when you quit the game and loaded the next time you select that character.

-NOTE-

The Palette Patch is disabled in splitscreen multiplayer. When you use multi mode, all players will have the standard 6 buttons to use, and when you reach 100 PB, your Mag will replace 3 of your buttons with Photon Blasts, as usual.

-TIPS-

1) Experiment until you find an ideal way to configure all four palettes, and then use that configuration on all of your characters to make it easier to remember which button does what.

2) You can map the same action to more than one palette. For instance, since androids do not have Techniques, you could configure the first palette with attacks and mates, the second palette with attacks and atomizers, the third palette with attacks and traps, and the fourth palette with attacks and Photon Blasts. The game is only aware of the currently active palette, so you can duplicate actions across palettes if having certain actions in more than one place is convenient.

3) If you're a Force who won't reach 100 PB before your teammates chain their Photon Blasts together, don't bother mapping any Photon Blasts to your palette, as you can always donate PB, instead.

4) If you're carrying multiple Mags, you can map all six Photon Blasts to your palette at once, and then you won't have to reconfigure your palettes in the middle of a run when you change Mags.

--------------
Installation:
--------------

After downloading and unzipping the PSO_GC_Palette_Patch.zip archive, you should have this README.txt file, as well as seven different patching programs. Each patching program is meant for one of the seven possible PSO GC releases that you might have:

NTSC-J 1.02 (JP regular disc)
NTSC-J 1.03 (JP regular disc)
NTSC-J 1.05 (JP Plus disc)
NTSC-U 1.00 (US regular disc)
NTSC-U 1.01 (US regular disc)
NTSC-U 1.02 (US Plus disc)
PAL 1.00 (EU regular disc)

If you're not sure which version of the game you have, look at the inner ring on the bottom of your disc, and you should see one of these product numbers:

DOL-GPOJ-0-02 (JP 1.02)
DOL-GPOJ-0-03 (JP 1.03)
DOL-GPOJ-0-05 (JP 1.05 Plus)
DOL-GPOE-0-00 (US 1.00)
DOL-GPOE-0-01 (US 1.01)
DOL-GPOE-0-02 (US 1.02 Plus)
DOL-GPOP-0-00 (EU 1.00)

You only need to use the patching program that matches the ISO dump of the disc you have.

Always be sure to keep a clean backup copy of your ISO, so that you don't have to dump your game again if you make a mistake!

In order to patch your ISO, you will need to use GCRebuilder to extract the game's main exectuable file, "PsoV3.dol". If you don't have GCRebuilder, you can find it in the GC downloads section of the main site. If you want a tutorial with pictures, you can find one in the GC guides section of the main site; otherwise, follow these steps:

1) Open GCRebuilder, select the "Image" option at the top, then select "Open". GCRebuilder will ask you to select an image to open. Navigate to the location of your PSO ISO file, select it, then click the "Open" button.

2) You will now see information about your PSO disc on the left side of the main GCRebuilder window, as well as a list of all the files on the disc on the right side of the main GCRebuilder window. The files are shown in alphabetical order by default, so use the scrollbar to scroll down until you find the file "PsoV3.dol".

Right click on the filename, and you'll get a small popup with the options "Import..." and "Export...". Click the "Export..." option, and then GCRebuilder will ask where you want to export this file. For simplicity, I suggest exporting it to C:\. Click the "Save" button to export PsoV3.dol to the folder you selected. We're done with GCRebuilder for the moment, but don't close it yet.

3) Now that we have extracted PsoV3.dol from the ISO, it's time to patch it. Run the patching program that matches the PSO disc you have, and then click the "..." button. A window will open asking you to select the "PsoV3.dol" file you want to patch. Navigate to C:\, and you should see the "PsoV3.dol" file you just extracted from your ISO. Select it, then click the "Open" button. I recommend unchecking the "Make a backup when possible" option, as you don't need a backup copy of "PsoV3.dol" (unless you think you might want to roll back from version 2.0 to version 1.2). Now press the "Start" button, and you should get confirmation that the file was successfully patched. When you close this message, the patching program will automatically close, too. You have now applied the patch, so it's time for the final step.

Before you begin the final step, you may want to apply other patches to your "PsoV3.dol" file. Once you've applied all of the patches you want to use, it's time to put the modified "PsoV3.dol" back into your ISO.

4) You should still have GCRebuilder open at this point, so this step is easy. Right click on "PsoV3.dol" in the GCRebuilder file list again, but this time, select the "Import..." option. A window will open asking you to select the file you want to import. Navigate to C:\ and select the "PsoV3.dol" file you patched in step 3. Click the "Open" button, and then you should get a confirmation window to indicate that the file import was successful.

That's it! You can now close GCRebuilder and use your patched PSO ISO file to play with Wii or Dolphin (or GC, if you have the necessary homebrew).

--------------------
Troubleshooting:
--------------------

If the patching program gives an error that says:

"PsoV3.dol - File size/version missmatch!"

then that means you tried to use a patching program that doesn't match your PSO disc. Double check which version of PSO GC you have and then select the patching program that matches your disc.

-------------
Changelog
-------------

1.0

-initial version!

1.1

-PB targetting bug fixed

1.2

-Splitscreen mode fixed
-Traps added to human/newman Action List for Battle mode
-Palette erasure when changing characters removed
-D-pad patch deprecated

2.0

-Palette saving added

---------
Credits:
---------

Huge thanks go out to Ralf for making this patch, as the game's lack of button assignments has been a problem since day one on the Dreamcast. The Quick Menu improved the game significantly, but it still wasn't enough to let you access every Technique at a moment's notice. With this patch, Forces in particular can finally use spells to their fullest potential.

That's the end of this README; I hope everyone enjoys no longer having to use Rafoie on individual enemies because they can't access Foie without slogging through a menu. Don't forget to visit PSO Palace, the home of this patch.

http://psopalace.funurl.com
_________________
"Fear the HUnewearl."
Aleron Ives- Socially-Devoid Member
- Number of posts : 2204
Age : 36
Registration date : 2008-03-24 -
![]()
![]()
Re: GC Patch Batch
![]() Aleron Ives Sun Mar 03, 2019 7:37 pm
Aleron Ives Sun Mar 03, 2019 7:37 pm
In addition, the Rain Patch is now available. This patch improves the rain effect in Forest 2 and Gal Gryphon and adds rain to Mountain Area to make it less visually dull compared to the rest of CCA.
- Code:
Phantasy Star Online GC
Rain Patch
Patcher by: Aleron Ives
Patch by: Ralf & Aleron Ives
http://psopalace.funurl.com

----------------
Introduction:
----------------

Welcome to the Rain Patch for PSO GC. This patch changes the rain effect in Forest 2 and Gal Gryphon to look more realistic, and it also adds rain to Mountain Area, since it's the most drab part of CCA.

--------------
Installation:
--------------

After downloading and unzipping the PSO_GC_Rain_Patch.zip archive, you should have this README.txt file, as well as seven different patching programs. Each patching program is meant for one of the seven possible PSO GC releases that you might have:

NTSC-J 1.02 (JP regular disc)
NTSC-J 1.03 (JP regular disc)
NTSC-J 1.05 (JP Plus disc)
NTSC-U 1.00 (US regular disc)
NTSC-U 1.01 (US regular disc)
NTSC-U 1.02 (US Plus disc)
PAL 1.00 (EU regular disc)

If you're not sure which version of the game you have, look at the inner ring on the bottom of your disc, and you should see one of these product numbers:

DOL-GPOJ-0-02 (JP 1.02)
DOL-GPOJ-0-03 (JP 1.03)
DOL-GPOJ-0-05 (JP 1.05 Plus)
DOL-GPOE-0-00 (US 1.00)
DOL-GPOE-0-01 (US 1.01)
DOL-GPOE-0-02 (US 1.02 Plus)
DOL-GPOP-0-00 (EU 1.00)

You only need to use the patching program that matches the ISO dump of the disc you have.

Always be sure to keep a clean backup copy of your ISO, so that you don't have to dump your game again if you make a mistake!

In order to patch your ISO, you will need to use GCRebuilder to extract the game's main exectuable file, "PsoV3.dol". If you don't have GCRebuilder, you can find it in the GC downloads section of the main site. If you want a tutorial with pictures, you can find one in the GC guides section of the main site; otherwise, follow these steps:

1) Open GCRebuilder, select the "Image" option at the top, then select "Open". GCRebuilder will ask you to select an image to open. Navigate to the location of your PSO ISO file, select it, then click the "Open" button.

2) You will now see information about your PSO disc on the left side of the main GCRebuilder window, as well as a list of all the files on the disc on the right side of the main GCRebuilder window. The files are shown in alphabetical order by default, so use the scrollbar to scroll down until you find the file "PsoV3.dol".

Right click on the filename, and you'll get a small popup with the options "Import..." and "Export...". Click the "Export..." option, and then GCRebuilder will ask where you want to export this file. For simplicity, I suggest exporting it to C:\. Click the "Save" button to export PsoV3.dol to the folder you selected. We're done with GCRebuilder for the moment, but don't close it yet.

3) Now that we have extracted PsoV3.dol from the ISO, it's time to patch it. Run the patching program that matches the PSO disc you have, and then click the "..." button. A window will open asking you to select the "PsoV3.dol" file you want to patch. Navigate to C:\, and you should see the "PsoV3.dol" file you just extracted from your ISO. Select it, then click the "Open" button. I recommend unchecking the "Make a backup when possible" option, as you don't need a backup copy of "PsoV3.dol". Now press the "Start" button, and you should get confirmation that the file was successfully patched. When you close this message, the patching program will automatically close, too. You have now applied the patch, so it's time for the final step.

Before you begin the final step, you may want to apply other patches to your "PsoV3.dol" file. Once you've applied all of the patches you want to use, it's time to put the modified "PsoV3.dol" back into your ISO.

4) You should still have GCRebuilder open at this point, so this step is easy. Right click on "PsoV3.dol" in the GCRebuilder file list again, but this time, select the "Import..." option. A window will open asking you to select the file you want to import. Navigate to C:\ and select the "PsoV3.dol" file you patched in step 3. Click the "Open" button, and then you should get a confirmation window to indicate that the file import was successful.

That's it! You can now close GCRebuilder and use your patched PSO ISO file to play with Wii or Dolphin (or GC, if you have the necessary homebrew).

--------------------
Troubleshooting:
--------------------

If the patching program gives an error that says:

"PsoV3.dol - File size/version missmatch!"

then that means you tried to use a patching program that doesn't match your PSO disc. Double check which version of PSO GC you have and then select the patching program that matches your disc.

---------
Credits:
---------

Thanks go out to Ralf for figuring out how the rain system works, as there are very few people who have the experience needed to find things like this in GC games.

That's the end of this README; I hope everyone enjoys the new Mountain aesthetic. Don't forget to visit PSO Palace, the home of this patch.

http://psopalace.funurl.com
_________________
"Fear the HUnewearl."
Aleron Ives- Socially-Devoid Member
- Number of posts : 2204
Age : 36
Registration date : 2008-03-24 -
![]()
![]()
Re: GC Patch Batch
![]() Aleron Ives Mon Apr 08, 2019 5:31 pm
Aleron Ives Mon Apr 08, 2019 5:31 pm
This patch also improves the Tekker by raising the odds of getting +1 special tier and +10%, so you don't have to spend as much time arguing to get the correct result.
Finally, this patch removes the annoying prompts asking if you want to equip stuff, so there are fewer dialogues to confirm when using the shop.
See the README below for more detailed information.
- Code:
Phantasy Star Online GC
Shop Patch
Patcher by: Aleron Ives
Patch by: Ralf & Aleron Ives
http://psopalace.funurl.com

----------------
Introduction:
----------------

Welcome to the Shop Patch for PSO GC. The purpose of this patch is to fix some annoyances with various aspects of the shop. This patch accomplishes three things:

1) The Tool Shop inventory has been rebalanced to offer more useful items based on your current level.

2) The Tekker has improved rates, so you don't have to argue as long to get the correct result.

3) The Arms Shop, Guards Shop, and Tekker will no longer prompt you regarding whether you can equip an item.

More information is available at the end of this README file.

--------------
Installation:
--------------

After downloading and unzipping the PSO_GC_Shop_Patch.zip archive, you should have this README.txt file, seven different patching programs, and two other files -- JudgeItem.rel and ToolRandom.rel. Unlike most patches, this patch requires two different actions:

1) Use the patching program that matches your disc to patch PsoV3.dol, as usual.

2) Replace JudgeItem.rel and ToolRandom.rel in your ISO with the pre-patched files that you unzipped along side the README and patching programs.

Each patching program is meant for one of the seven possible PSO GC releases that you might have:

NTSC-J 1.02 (JP regular disc)
NTSC-J 1.03 (JP regular disc)
NTSC-J 1.05 (JP Plus disc)
NTSC-U 1.00 (US regular disc)
NTSC-U 1.01 (US regular disc)
NTSC-U 1.02 (US Plus disc)
PAL 1.00 (EU regular disc)

If you're not sure which version of the game you have, look at the inner ring on the bottom of your disc, and you should see one of these product numbers:

DOL-GPOJ-0-02 (JP 1.02)
DOL-GPOJ-0-03 (JP 1.03)
DOL-GPOJ-0-05 (JP 1.05 Plus)
DOL-GPOE-0-00 (US 1.00)
DOL-GPOE-0-01 (US 1.01)
DOL-GPOE-0-02 (US 1.02 Plus)
DOL-GPOP-0-00 (EU 1.00)

You only need to use the patching program that matches the ISO dump of the disc you have.

Always be sure to keep a clean backup copy of your ISO, so that you don't have to dump your game again if you make a mistake!

In order to patch your ISO, you will need to use GCRebuilder to extract the game's main exectuable file, "PsoV3.dol". If you don't have GCRebuilder, you can find it in the GC downloads section of the main site. If you want a tutorial with pictures, you can find one in the GC guides section of the main site; otherwise, follow these steps:

1) Open GCRebuilder, select the "Image" option at the top, then select "Open". GCRebuilder will ask you to select an image to open. Navigate to the location of your PSO ISO file, select it, then click the "Open" button.

2) You will now see information about your PSO disc on the left side of the main GCRebuilder window, as well as a list of all the files on the disc on the right side of the main GCRebuilder window. The files are shown in alphabetical order by default, so use the scrollbar to scroll down until you find the file "PsoV3.dol".

Right click on the filename, and you'll get a small popup with the options "Import..." and "Export...". Click the "Export..." option, and then GCRebuilder will ask where you want to export this file. For simplicity, I suggest exporting it to C:\. Click the "Save" button to export PsoV3.dol to the folder you selected. We're done with GCRebuilder for the moment, but don't close it yet.

3) Now that we have extracted PsoV3.dol from the ISO, it's time to patch it. Run the patching program that matches the PSO disc you have, and then click the "..." button. A window will open asking you to select the "PsoV3.dol" file you want to patch. Navigate to C:\, and you should see the "PsoV3.dol" file you just extracted from your ISO. Select it, then click the "Open" button. I recommend unchecking the "Make a backup when possible" option, as you don't need a backup copy of "PsoV3.dol" (unless you think you might want to roll back from version 2.0 to version 1.2). Now press the "Start" button, and you should get confirmation that the file was successfully patched. When you close this message, the patching program will automatically close, too. You have now applied the patch, so it's time for the final step.

Before you begin the final step, you may want to apply other patches to your "PsoV3.dol" file. Once you've applied all of the patches you want to use, it's time to put the modified "PsoV3.dol" back into your ISO.

4) You should still have GCRebuilder open at this point, so this step is easy. Right click on "PsoV3.dol" in the GCRebuilder file list again, but this time, select the "Import..." option. A window will open asking you to select the file you want to import. Navigate to C:\ and select the "PsoV3.dol" file you patched in step 3. Click the "Open" button, and then you should get a confirmation window to indicate that the file import was successful.

5) Use the GCRebuilder scrollbar to scroll up until you find the file "JudgeItem.rel". Right click on "JudgeItem.rel" and select the "Import..." option. A window will open asking you to select the file you want to import. Import the new JudgeItem.rel file included with this patch.

6) Use the GCRebuilder scrollbar to scroll down until you find the file "ToolRandom.rel". Right click on "ToolRandom.rel" and select the "Import..." option. A window will open asking you to select the file you want to import. Import the new ToolRandom.rel file included with this patch.

That's it! You can now close GCRebuilder and use your patched PSO ISO file to play with Wii or Dolphin (or GC, if you have the necessary homebrew).

--------------------
Troubleshooting:
--------------------

If the patching programs give an error that says:

"PsoV3.dol - File size/version missmatch!"

then that means you tried to use a patching program that doesn't match your PSO disc. Double check which version of PSO GC you have and then select the patching program that matches your disc.

--------
Details
--------

1) The Tool Shop will now introduce the following item changes at the following levels:

Lv51: Trimate, Trifluid become fixed; Antidote, Antiparalysis appear randomly (high rate); Scape Doll appears randomly (low rate)

Lv101: Sol & Star Atomizer become fixed; Telepipe, Trap Vision appear randomly (high rate); Antidote, Antiparalysis appearance rate is reduced

This way, you can always buy the useful healing items from the shop without having to reload Pioneer 2 to make them appear. Unfortunately, the Tool Shop has a limit of 11 items that can appear at once, so it's impossible to make everything appear every time. Since Sol Atomizer functionally replaces Antidote and Antiparalysis, it makes the most sense to demote them to random item status. Telepipe and Trap Vision generally do not need to be used as often as healing items do, so they are also demoted to random items but at a high enough rate that they will usually appear.

Adjusting the required levels for each tier helps with the problem of Mag feeding, as new characters need Antidote and Antiparalysis to feed their Mag. Your Mag will be level 200 long before your character reaches level 101, so keeping Antidote and Antiparalysis easily accessible until then reduces the impact of the shop changes on Mag feeders. If you want to raise more Mags, Antidote and Antiparalysis are still available, although you will have to reload Pioneer 2 several times to make them appear. Overall, this is the best tradeoff I can make with Sega's limited coding of the Tool Shop.

2) The Tekker now has a greatly improved chance of giving you +1 special tier and +10%. In addition, each Tekker's speciality has been enhanced. Each Tekker is more proficient at tekking a specific type of non-rare weapon and will be more likely to produce the correct result when tekking that weapon type. The Tekker proficiencies are:

Viridia: Shot
Greennill: Rifle
Skyly: Sword
Bluefull: Partisan
Purplenum: Mechgun
Pinkal: Cane
Redria: Handgun (new)
Oran: Dagger
Yellowboze: Saber (new)
Whitill: Slicer

On average, it would take 9 tries to tek a weapon to +1 special tier and +10%, but it would take 3 tries to get the same result with the Tekker who is proficient at the type of weapon you're tekking.

3) The following prompts have been removed:

Do you wish to equip it now?
You cannot equip it.  OK?
Your skill is not good enough to equip it now,  OK?

This makes for fewer dialogues to confirm before buying items or when tekking multiple weapons.

---------
Credits:
---------

Huge thanks go out to Ralf for figuring out how the shop tier system works and to Soly for figuring out how Sega's shop .rel files work.

That's the end of this README; I hope everyone enjoys being able to buy Monomates after level 42. Don't forget to visit PSO Palace, the home of this patch.

http://psopalace.funurl.com
_________________
"Fear the HUnewearl."
Aleron Ives- Socially-Devoid Member
- Number of posts : 2204
Age : 36
Registration date : 2008-03-24 -
![]()
![]()
Re: GC Patch Batch
![]() Aleron Ives Sun May 05, 2019 8:31 pm
Aleron Ives Sun May 05, 2019 8:31 pm
- Code:
Phantasy Star Online GC
Movement Patch
Patcher by: Aleron Ives
Patch by: Ralf
http://psopalace.funurl.com

----------------
Introduction:
----------------

Welcome to the Movement Patch for PSO GC. The purpose of this patch is to fix two problems with the way your character moves.

1) Animations that are intended to make you step backwards are allowed to do so again. Sega added a check in GC to prevent you from using such animations to walk through objects, but it appears Sega was so paranoid about this old Dreamcast bug that they simply disabled all animations that make you step backwards altogether. This is a big problem for animations such as the male Double Saber animation, because without the ability to step backwards out of an enemy's attack range, you'll usually get hit after doing a full combo attack. As long as there are no objects behind you, you'll now be able to step backwards with all attack animations.

2) You can move when enemies are nearby again. Sega disables your movement whenever you touch an object on GC, most likely to prevent other players from seeing your character spinning wildly whenever you're walking in place. Unfortunately, this cosmetic change also means that whenever you get close to enemies, the joystick gets disabled. Not only does this prevent you from wiggling out of tight enemy formations, but it also prevents you from picking which enemy you want to attack when you're surrounded, since you can't turn around. This patch fixes both of these problems.

--------------
Installation:
--------------

After downloading and unzipping the PSO_GC_Movement_Patch.zip archive, you should have this README.txt file, as well as seven different patching programs. Each patching program is meant for one of the seven possible PSO GC releases that you might have:

NTSC-J 1.02 (JP regular disc)
NTSC-J 1.03 (JP regular disc)
NTSC-J 1.05 (JP Plus disc)
NTSC-U 1.00 (US regular disc)
NTSC-U 1.01 (US regular disc)
NTSC-U 1.02 (US Plus disc)
PAL 1.00 (EU regular disc)

If you're not sure which version of the game you have, look at the inner ring on the bottom of your disc, and you should see one of these product numbers:

DOL-GPOJ-0-02 (JP 1.02)
DOL-GPOJ-0-03 (JP 1.03)
DOL-GPOJ-0-05 (JP 1.05 Plus)
DOL-GPOE-0-00 (US 1.00)
DOL-GPOE-0-01 (US 1.01)
DOL-GPOE-0-02 (US 1.02 Plus)
DOL-GPOP-0-00 (EU 1.00)

You only need to use the patching program that matches the ISO dump of the disc you have.

Always be sure to keep a clean backup copy of your ISO, so that you don't have to dump your game again if you make a mistake!

In order to patch your ISO, you will need to use GCRebuilder to extract the game's main exectuable file, "PsoV3.dol". If you don't have GCRebuilder, you can find it in the GC downloads section of the main site. If you want a tutorial with pictures, you can find one in the GC guides section of the main site; otherwise, follow these steps:

1) Open GCRebuilder, select the "Image" option at the top, then select "Open". GCRebuilder will ask you to select an image to open. Navigate to the location of your PSO ISO file, select it, then click the "Open" button.

2) You will now see information about your PSO disc on the left side of the main GCRebuilder window, as well as a list of all the files on the disc on the right side of the main GCRebuilder window. The files are shown in alphabetical order by default, so use the scrollbar to scroll down until you find the file "PsoV3.dol".

Right click on the filename, and you'll get a small popup with the options "Import..." and "Export...". Click the "Export..." option, and then GCRebuilder will ask where you want to export this file. For simplicity, I suggest exporting it to C:\. Click the "Save" button to export PsoV3.dol to the folder you selected. We're done with GCRebuilder for the moment, but don't close it yet.

3) Now that we have extracted PsoV3.dol from the ISO, it's time to patch it. Run the patching program that matches the PSO disc you have, and then click the "..." button. A window will open asking you to select the "PsoV3.dol" file you want to patch. Navigate to C:\, and you should see the "PsoV3.dol" file you just extracted from your ISO. Select it, then click the "Open" button. I recommend unchecking the "Make a backup when possible" option, as you don't need a backup copy of "PsoV3.dol". Now press the "Start" button, and you should get confirmation that the file was successfully patched. When you close this message, the patching program will automatically close, too. You have now applied the patch, so it's time for the final step.

Before you begin the final step, you may want to apply other patches to your "PsoV3.dol" file. Once you've applied all of the patches you want to use, it's time to put the modified "PsoV3.dol" back into your ISO.

4) You should still have GCRebuilder open at this point, so this step is easy. Right click on "PsoV3.dol" in the GCRebuilder file list again, but this time, select the "Import..." option. A window will open asking you to select the file you want to import. Navigate to C:\ and select the "PsoV3.dol" file you patched in step 3. Click the "Open" button, and then you should get a confirmation window to indicate that the file import was successful.

That's it! You can now close GCRebuilder and use your patched PSO ISO file to play with Wii or Dolphin (or GC, if you have the necessary homebrew).

--------------------
Troubleshooting:
--------------------

If the patching program gives an error that says:

"PsoV3.dol - File size/version missmatch!"

then that means you tried to use a patching program that doesn't match your PSO disc. Double check which version of PSO GC you have and then select the patching program that matches your disc.

---------
Credits:
---------

Huge thanks go out to Ralf for making this patch, as these movement problems make combat unnecessarily frustrating on GC at times, and there are very few people who have the experience needed to find things like this in GC games.

That's the end of this README; I hope everyone enjoys being able to move more freely again. Don't forget to visit PSO Palace, the home of this patch.

http://psopalace.funurl.com
_________________
"Fear the HUnewearl."
Aleron Ives- Socially-Devoid Member
- Number of posts : 2204
Age : 36
Registration date : 2008-03-24 -
![]()
![]()
Re: GC Patch Batch
![]() Aleron Ives Sun Jul 14, 2019 2:47 am
Aleron Ives Sun Jul 14, 2019 2:47 am
_________________
"Fear the HUnewearl."
Aleron Ives- Socially-Devoid Member
- Number of posts : 2204
Age : 36
Registration date : 2008-03-24 -
![]()
![]()
Page 1 of 2 • 1, 2 ![]()
![]()